Locofy MCP for Cursor, GitHub Copilot, Windsurf & Claude Desktop
Locofy MCP (Model Context Protocol) allows Locofy.ai code to be integrated and extended with other AI code editors like Cursor, Windsurf, Claude Desktop, and others. It not only improves the accuracy and relevance of generated code but also unlocks new possibilities for utilizing Locofy-generated frontend code more effectively.
Benefits of MCP
- Code Cleanup - Easily cleanup and finetune Locofy.ai generated code.
- Enhanced Interactivity – Effortlessly add scripting and motion to components like carousels, tab galleries, and more.
- Extend Code Beyond UI – Add logic, accessibility, localisation, and more. The possibilities are endless.
- Improved Security & Testing Capabilities - Ensure the generated code meets your requirements.
Getting Started with Locofy MCP
To get started with Locofy MCP, follow these steps:
- Open the Locofy plugin in Figma and create a project, if not created already.
- Convert your designs to code using Locofy. Make sure you have optimised your Figma designs correctly (opens in a new tab) beforehand for high quality code.
- Sync your designs to Locofy Builder.
- Finally, generate your MCP tokens & start using it in your IDE.

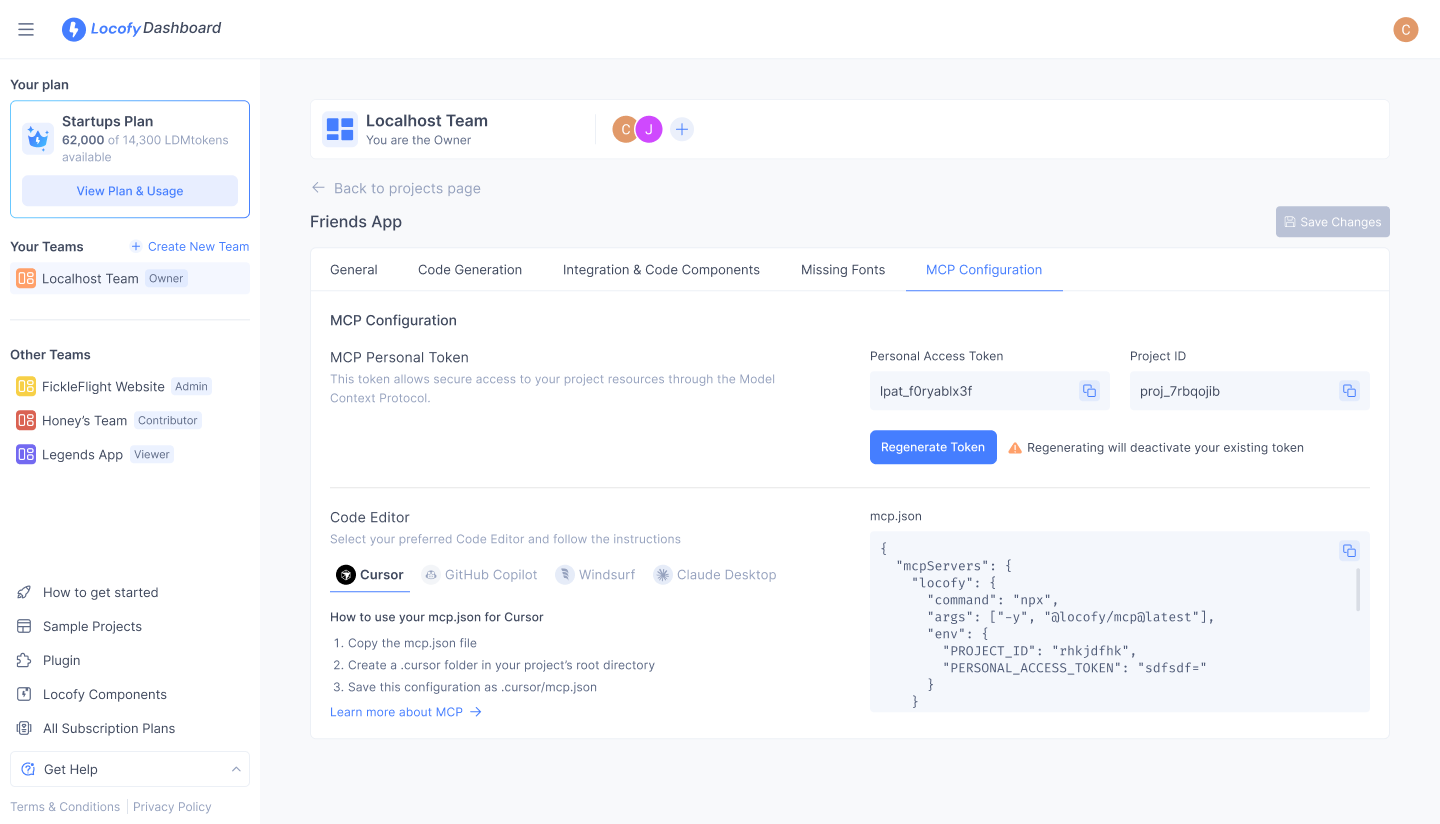
Generating MCP Token
To configure MCP for your project, follow these steps:
- Go to Locofy Dashboard (opens in a new tab) and select the Locofy project for which you want to enable MCP.
- Next, click on the gear icon to go to the project settings.
- Locate the MCP Configuration tab.

- Choose the desired token expiry option:
- 1 Month Expiry
- No Expiry
- Click the Generate Token button.
- Select your IDE and click on the copy button to copy the MCP configuration file.
You can now use this in any IDE that supports MCP servers.
Setting up Locofy MCP in Different Editors
Once you’ve copied your MCP configuration file, follow the steps below to set it up in your preferred environment.
To use the mcp.json file generated above in Cursor, first we need to configure it as a server in Cursor before we start to use it.
- In your project’s root directory, create a
.cursorfolder if it doesn’t already exist. - Save the copied configuration file inside
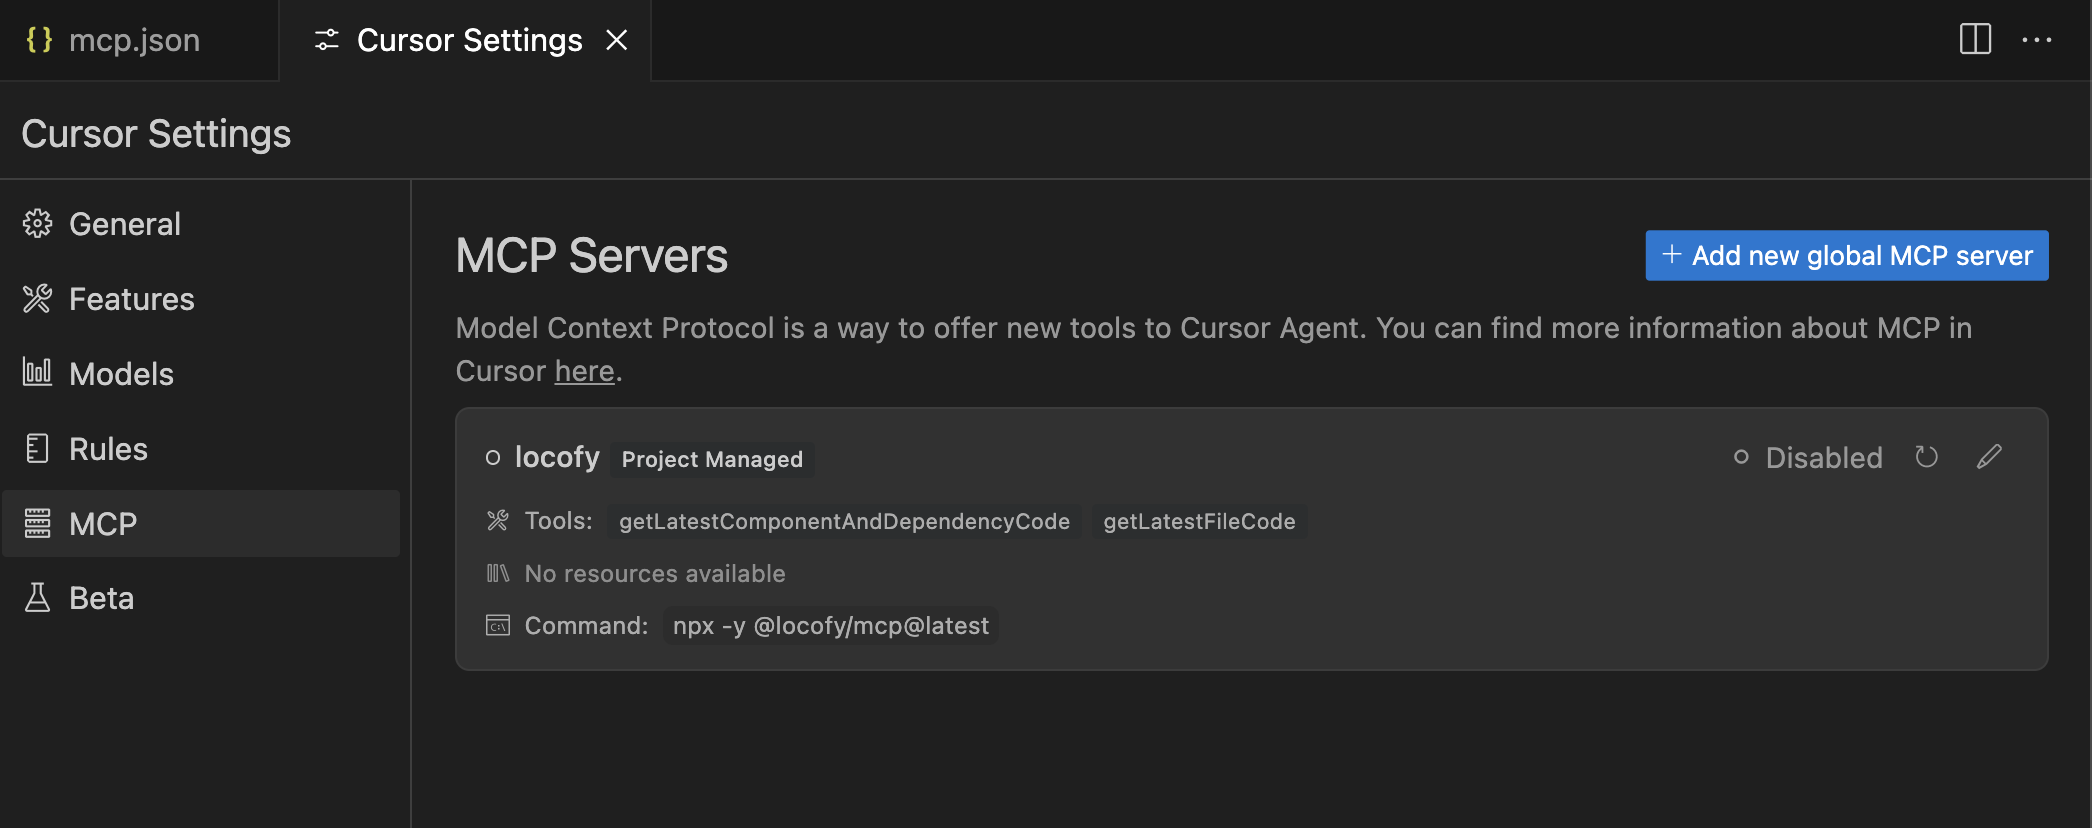
.cursorasmcp.json. - Next, go to Cursor settings and click on MCP tab.
-
Click on the MCP tab & you will find Locofy server as an option.
-
Click "Disabled" to enable the server. It can take a few seconds to start the server.
Using Locofy MCP
-
Go to any of your code files and open chat in your IDE. You can also use shortcut ⌘ + I or ⌘ + L depending upon your IDE to open it.
-
Make sure you're using Agent mode and not in Ask or Edit mode in chat.
-
You can now directly pull code from Locofy using natural language. You can also customise the code using the power of LLMs.
For example:Fetch the NavigationBar component from Locofy.Pull Homepage from Locofy & replace the navbar with the one present in this project.Get ListingCard component from Locofy & merge it with my code.Pull Homepage from Locofy and make it accessiblePull ListingCard Component and cleanup my code and add state variablesPull Homepage and make it work in Arabic in RTL
-
Locofy will provide you with two tools to pull the code. Click on "Run tool" to execute the function required by the LLM to process your prompt.
- getLatestComponentAndDependencyCode: Retrieve code along with their dependencies, including any required components, styling files such as CSS, and other related assets to ensure seamless integration.
- getLatestFileCode: Retrieves specific files by name without their dependencies, making it useful when you need only a particular file's content.
Regenerating MCP Token
If your MCP token has expired or you need to generate a new one, follow these steps:
- Go to the Locofy Dashboard (opens in a new tab) and select the project for which you need to regenerate the MCP token.
- Click on the gear icon to access Project Settings.
- Navigate to the MCP Configuration tab.
- Click the Regenerate Token button to invalidate the previous token and create a new one.
- A popup will open where you can choose the desired token expiry option of your new tokens and confirm the decision to revoke existing one.
- Click Regenerate Token and download the updated
mcp.jsonfile. - Replace the old
mcp.jsonfile in your project with the newly generated one.
Your new MCP token is now active, ensuring continued access to Locofy MCP.
Examples
Adding Accessibility
- Create a new file and open Cursor chat.
- Pull Locofy code by running a prompt. For example:
Pull HomeCard from Locofy.- Run another prompt to make it accessible:
Improve the accessibility of this code by ensuring all interactive elements have appropriate ARIA attributes, sufficient color contrast, keyboard navigation support, and semantic HTML.
Also, add meaningful alt text for images and ensure proper focus management for modals and dynamic elements.
Adding Form Validations
- Create a new file and open Cursor chat.
- Pull a form component from Locofy by running a prompt. For example:
Fetch SignupForm from Locofy.- Run another prompt to add validation:
Enhance this form by adding client-side validation for required fields, proper error messages, and validation for email format and password strength.
Also, ensure the form is accessible with screen readers and provides clear feedback on errors.
Converting to Dark Mode
- Create a new file and open Cursor chat.
- Pull a UI component from Locofy by running a prompt. For example:
Fetch Dashboard from Locofy.- Run another prompt to enable dark mode:
Modify this component to support dark mode using CSS variables or a theme provider.
Ensure colors, contrast, and UI elements adapt properly in both light and dark modes.