Components & Props
Creating components and props helps you to get modularised code with better structure and organisation. It also reduces code duplication and lets you easily render content with dynamic data.
With LocoAI, we split the code generated by us into reusable components with props.
Switching from Preview Mode to Edit Mode
When you first open your project, it starts in Preview Mode, allowing you to view how your design looks and functions. To begin editing, click the "Edit" button in the top toolbar. This will switch the interface to Edit Mode, where you can access all the features and settings needed to modify your project.
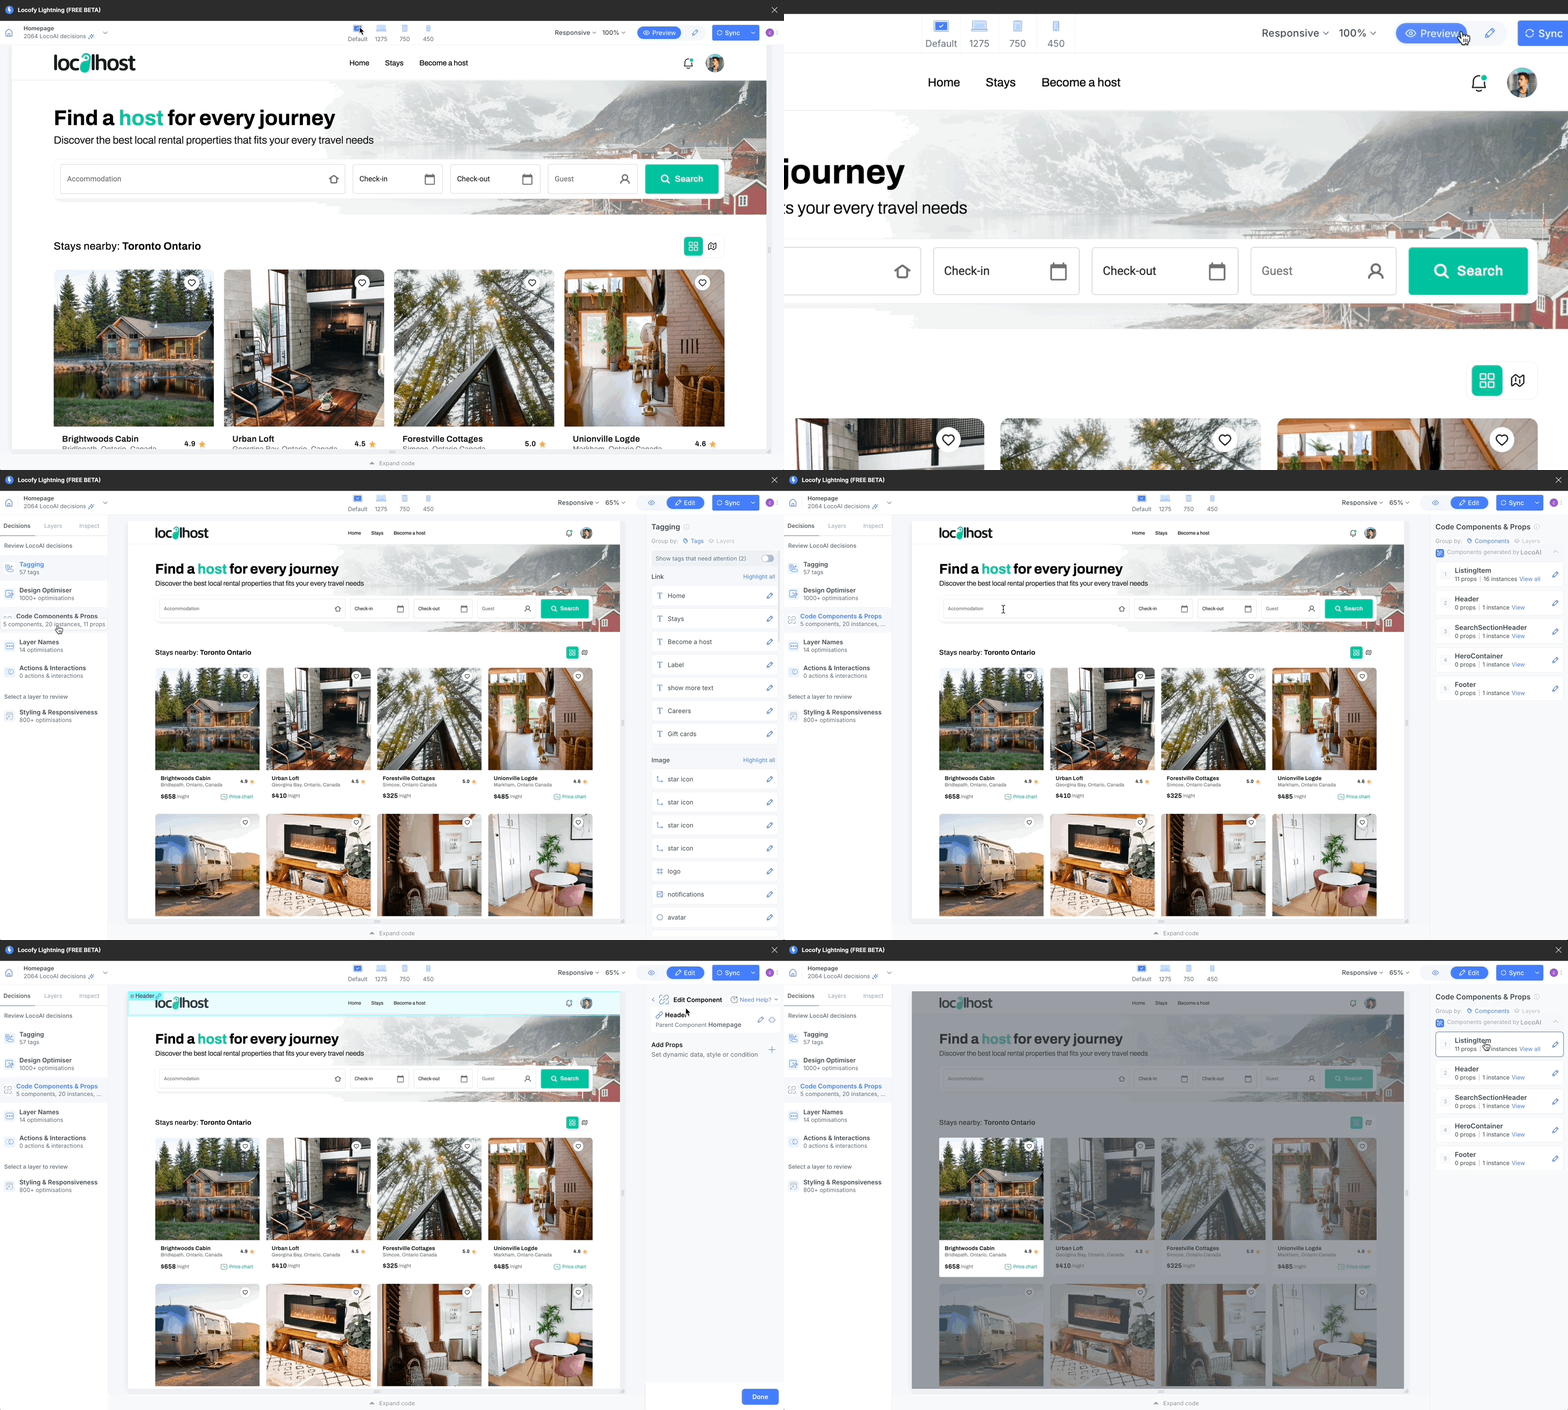
You can return to Preview Mode anytime by clicking the "Preview" button, enabling you to check your changes in real time.
Reviewing component
After the Locofy.ai wizard scans and creates the components, you can review and edit them.
-
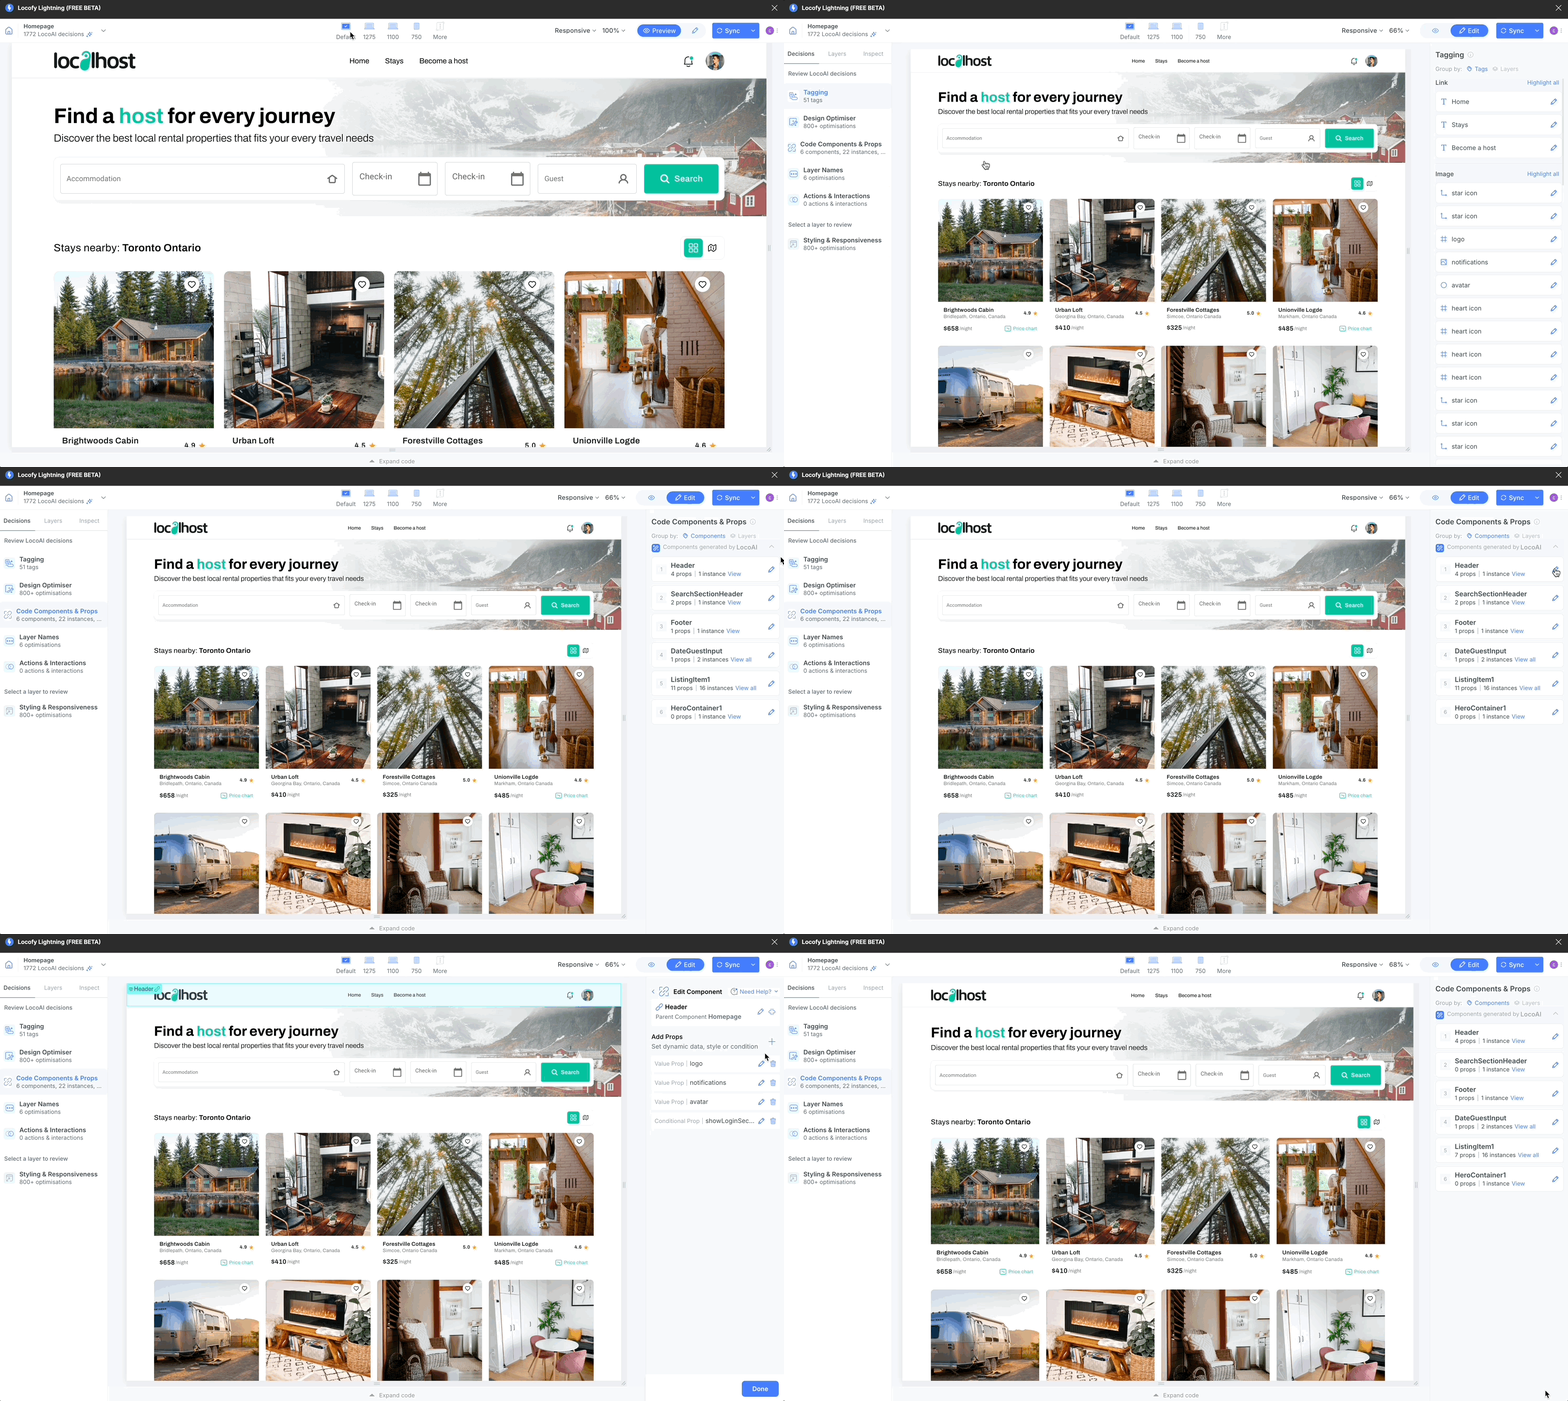
Go to the Edit mode and to to Decisions tab and select Code Components and Props.
-
Click the edit button next to any component to modify it, or click view to see its preview in the panel.
-
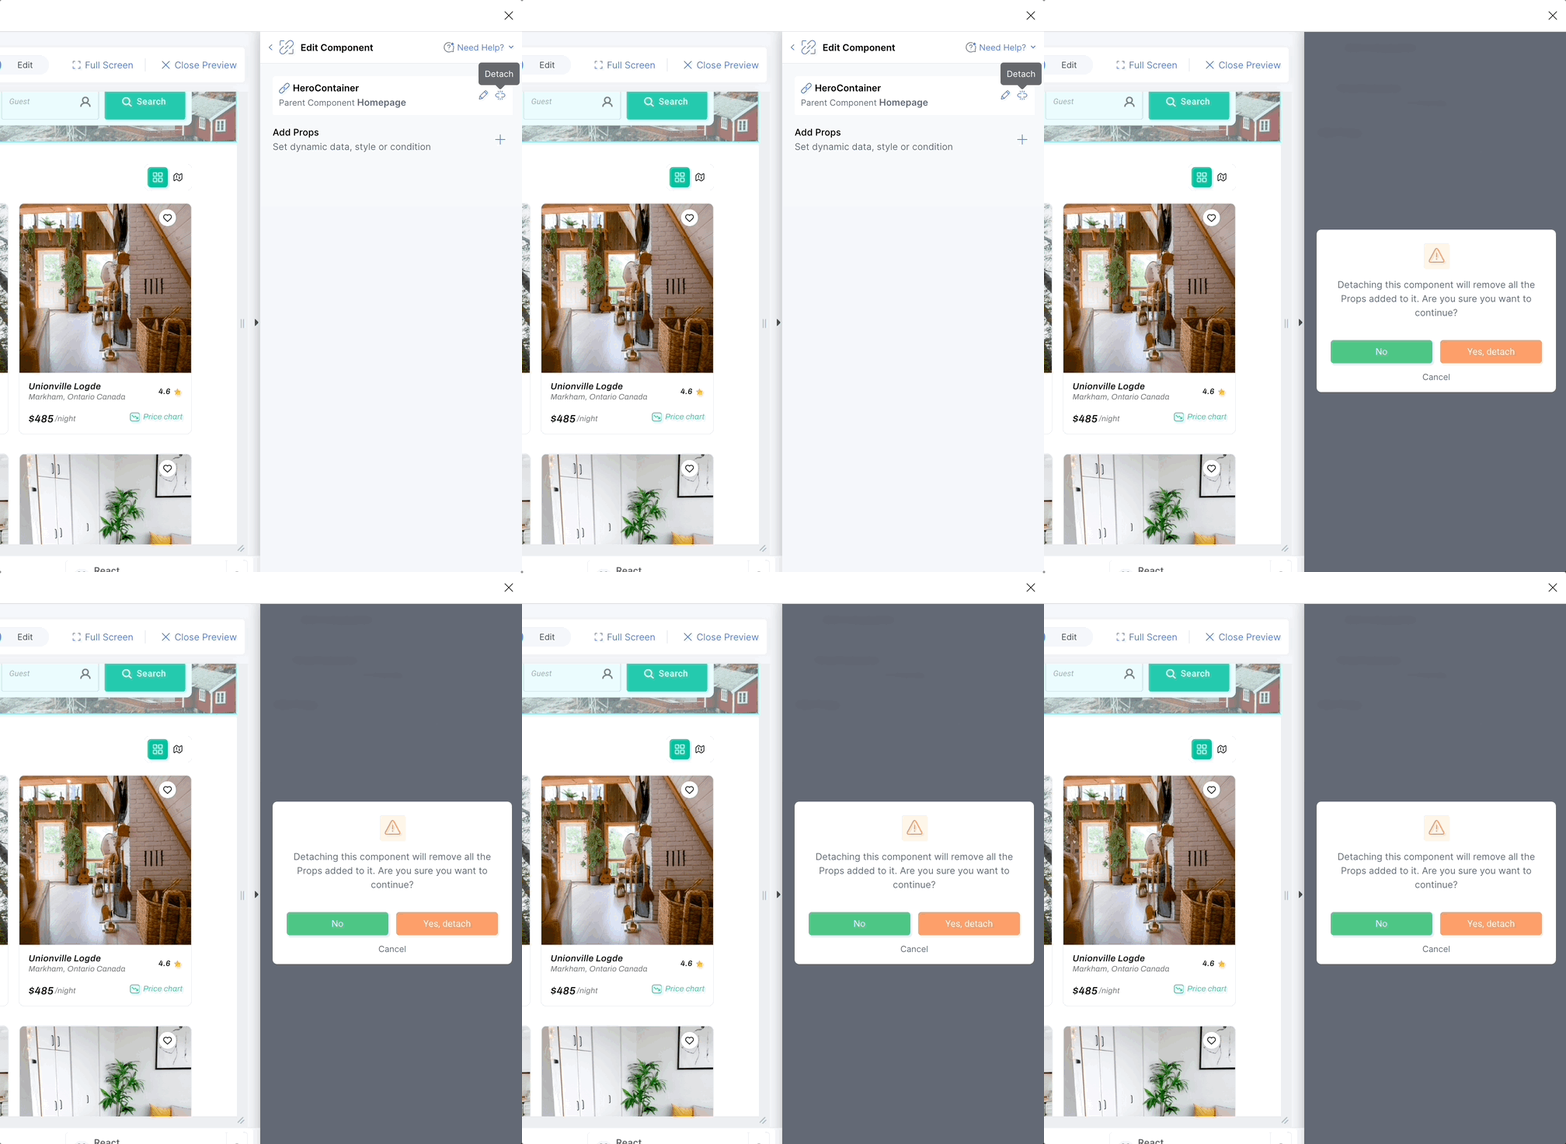
After selecting edit, you can modify or detach the component using the detach icon in the header. An edit icon beside the detach icon lets you change the component name. You can also edit or delete any existing props within the component.
Creating component
The Locofy plugin offers two modes: preview and edit. Each mode provides different methods for creating components.
Edit mode
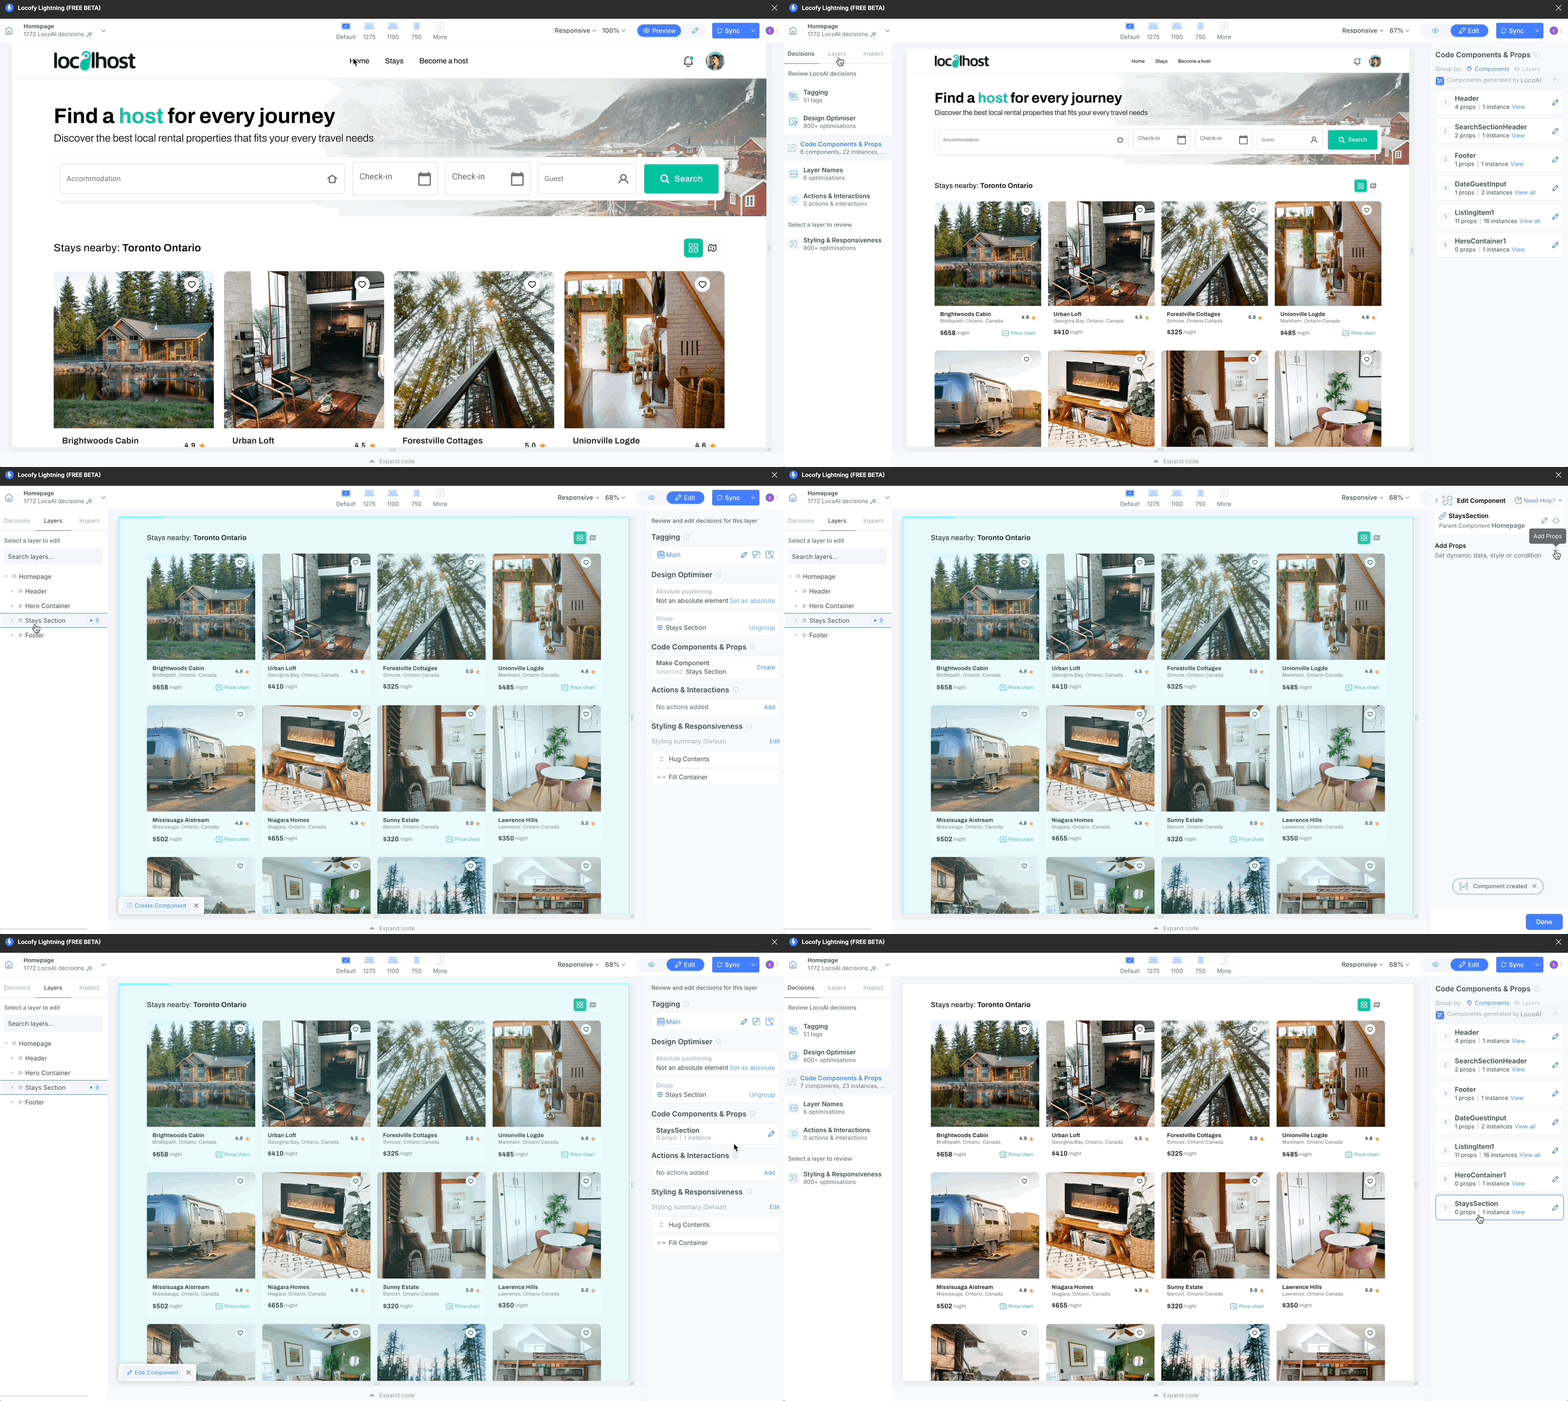
1.Switch to edit mode and click the Layer you want to convert into a component. This will immediately display the Create Component popup highlighting the selected layer.
- Click Create Component, enter a name for your component, and then save it. Upon successful creation, you'll see the component settings on the right and the code at the bottom.
Edit components settings
Ways to Access Component Settings
As detailed in the Creating Component documentation, the Locofy plugin offers two modes for working with components: Preview and Edit. Here's how to access the component settings in each mode:
-
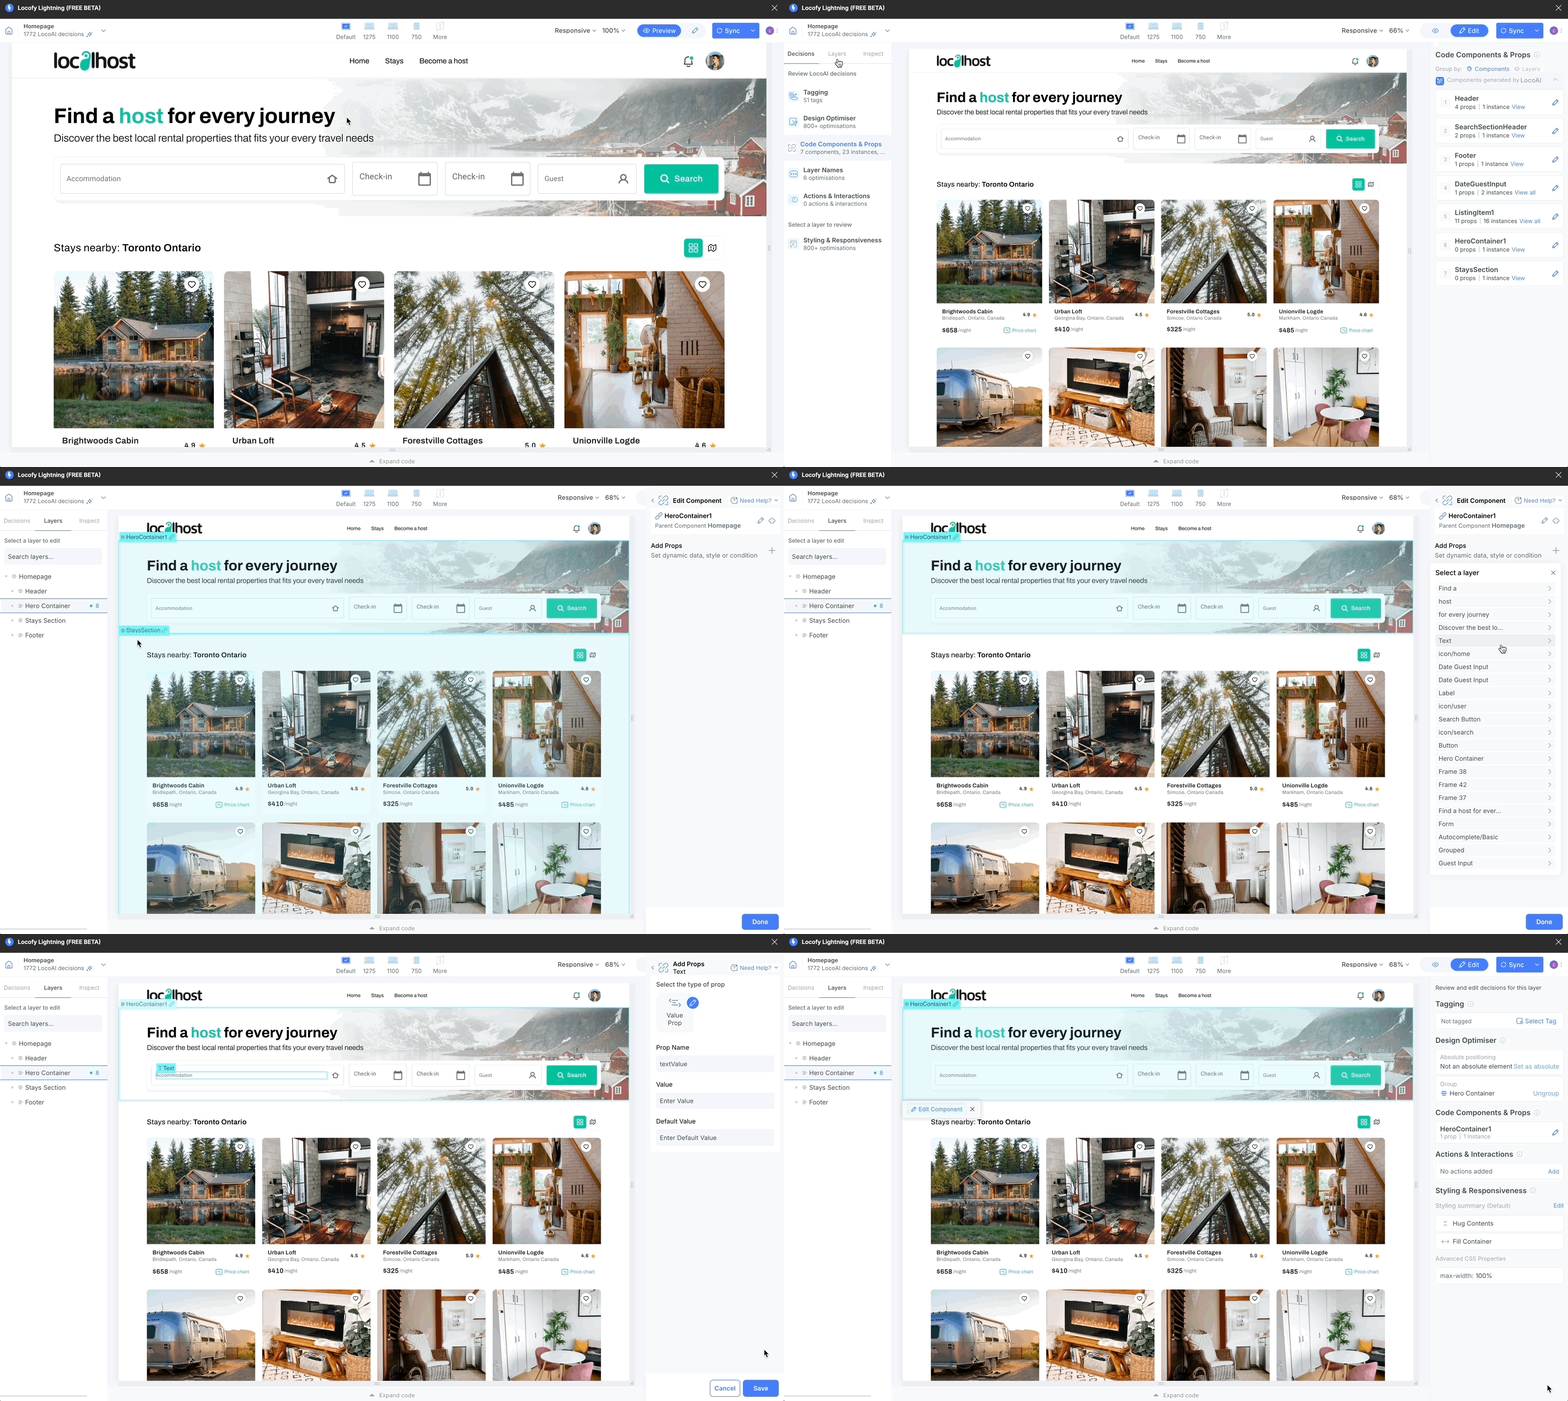
Switch to edit mode and click on a component layer. Upon clicking, the Edit Component popup will appear, highlighting the selected component.
-
Selecting Edit Component from the popup takes you to the edit component section, where you can modify the component's properties.
Changing component name
Within the component edit settings, simply click the edit button next to the component name to modify it. Once you've made your changes, save them to finalize the update.

Detaching a component
To remove a component, simply click the Detach button.
You will then be prompted to make a decision to detach all the instances, or just the selected instance.
Adding Props to Components
Within the component settings, you have two options for adding props. One is the the edit component section and other is in the preview section
In edit settings section
- Click on the plus icon

- Select a prop from the list

- Here you will get three options - value prop, style prop and conditional rendering prop

- Value prop: To add value to your prop

- Style prop: To add css style as a prop

- Conditional rendering: Locofy allows you to control the visibility of components based on certain conditions using conditional rendering props. You can achieve this by:
a) Creating new prop - Define a new prop specifically for controlling the visibility of the component.

b) Using existing prop - Use an existing prop's value to determine whether to render the component.

Editing props
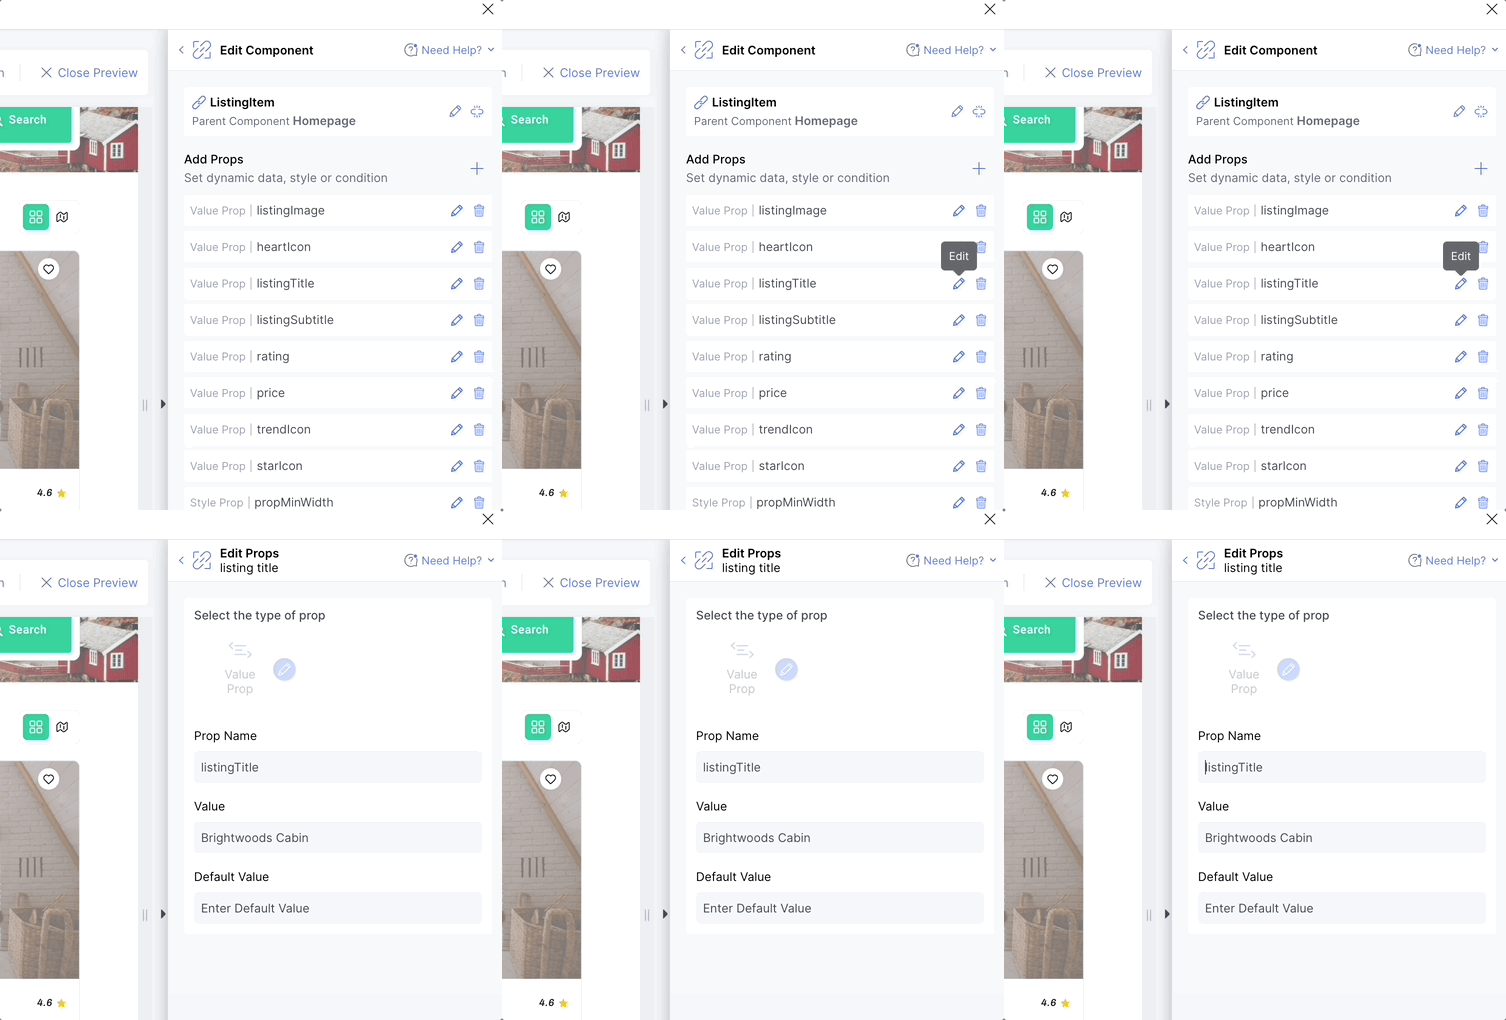
- Click on edit icon corresponding to the prop you want to modify and then just save to apply your changes.
Deleting props
To delete a prop, click the delete icon next to it.

Locofy Builder allows you to manage and modify components and props. For more information, refer to Auto components and props (opens in a new tab) and Adding style props for dynamic styles (opens in a new tab) from the Builder (opens in a new tab) docummentation.