Layer Names
LocoAI generates the appropriate layer names so the code is human-readable.
By using these user-friendly names, we generate names for classes that makes it easier for devs to understand and extend the code.
Reviewing Layer Names
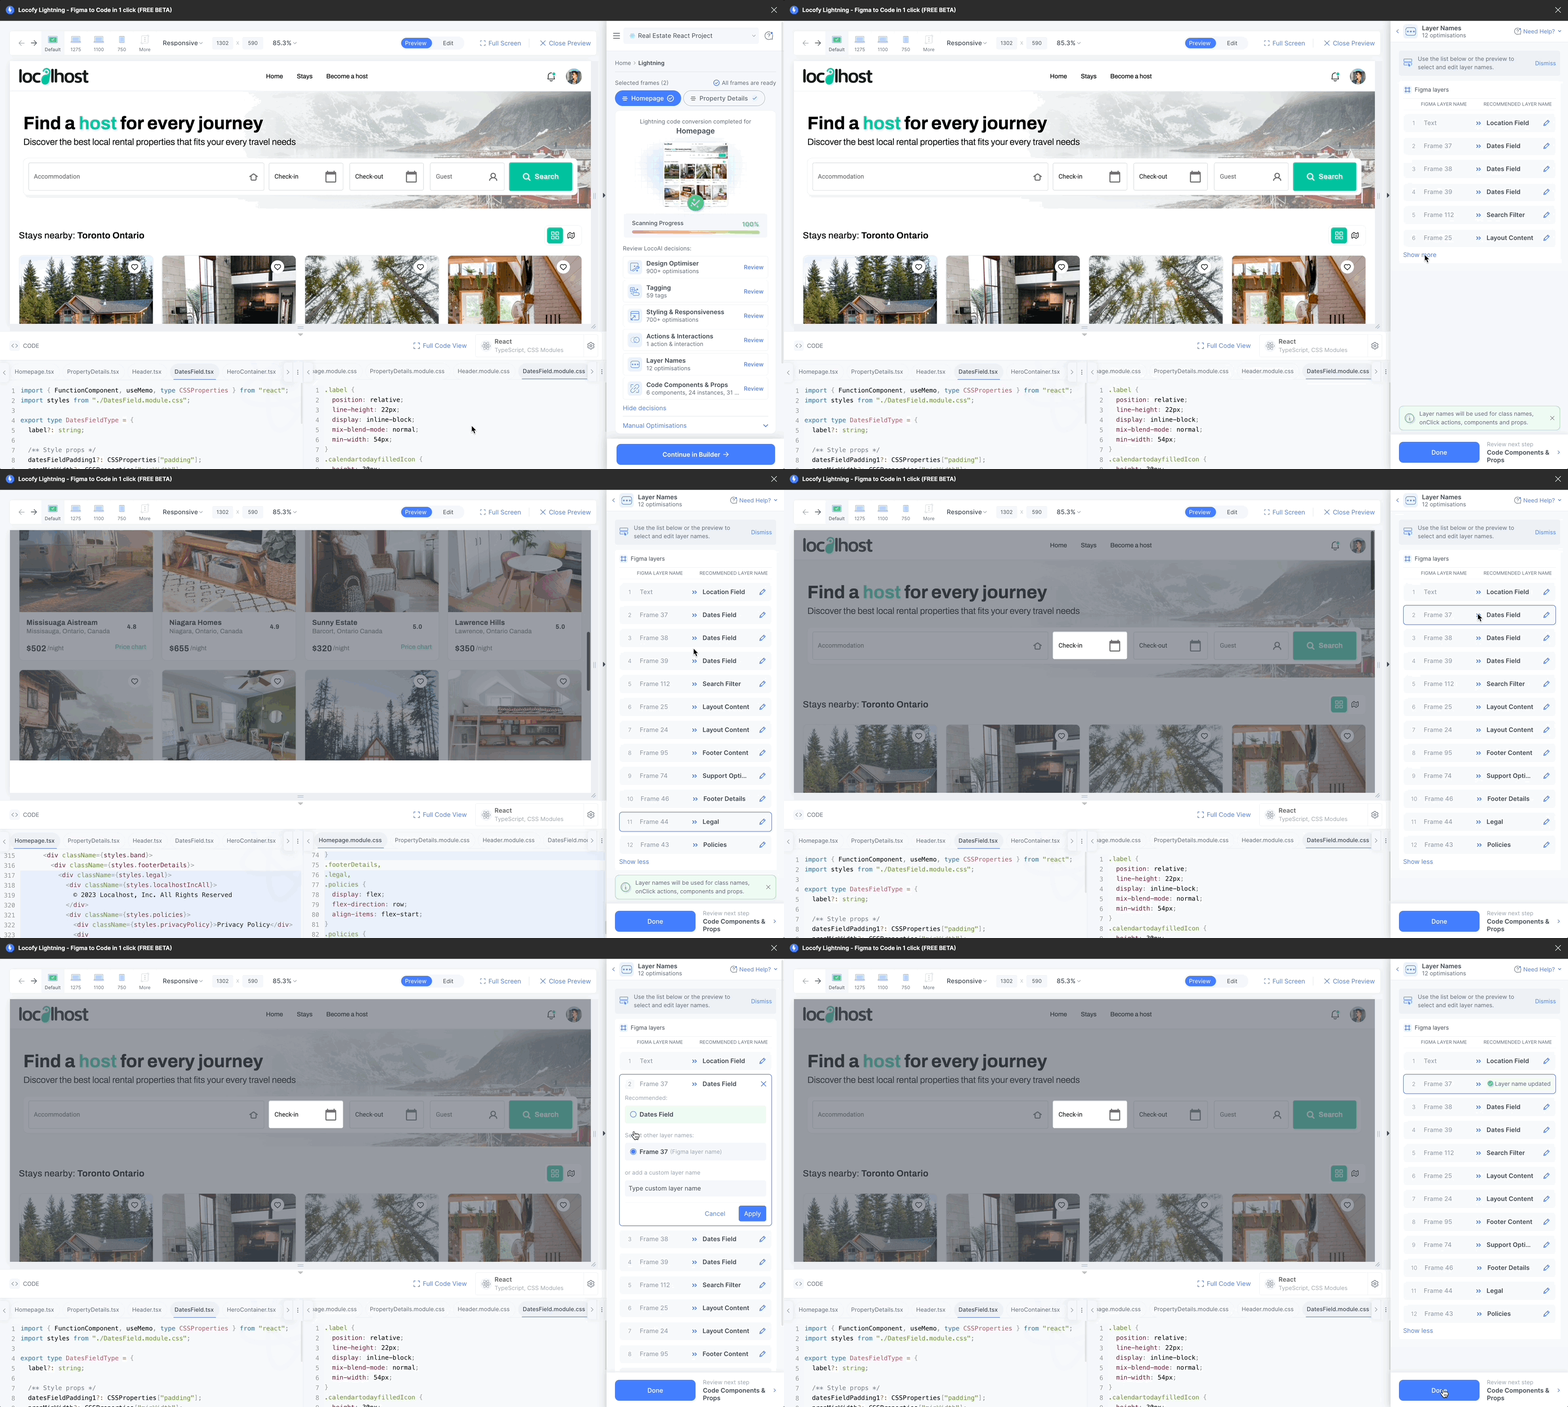
After the Locofy.ai wizard has scanned & optimised the layer names, you can review and edit them.
- Click on the "Review" button next to "Layer Names"
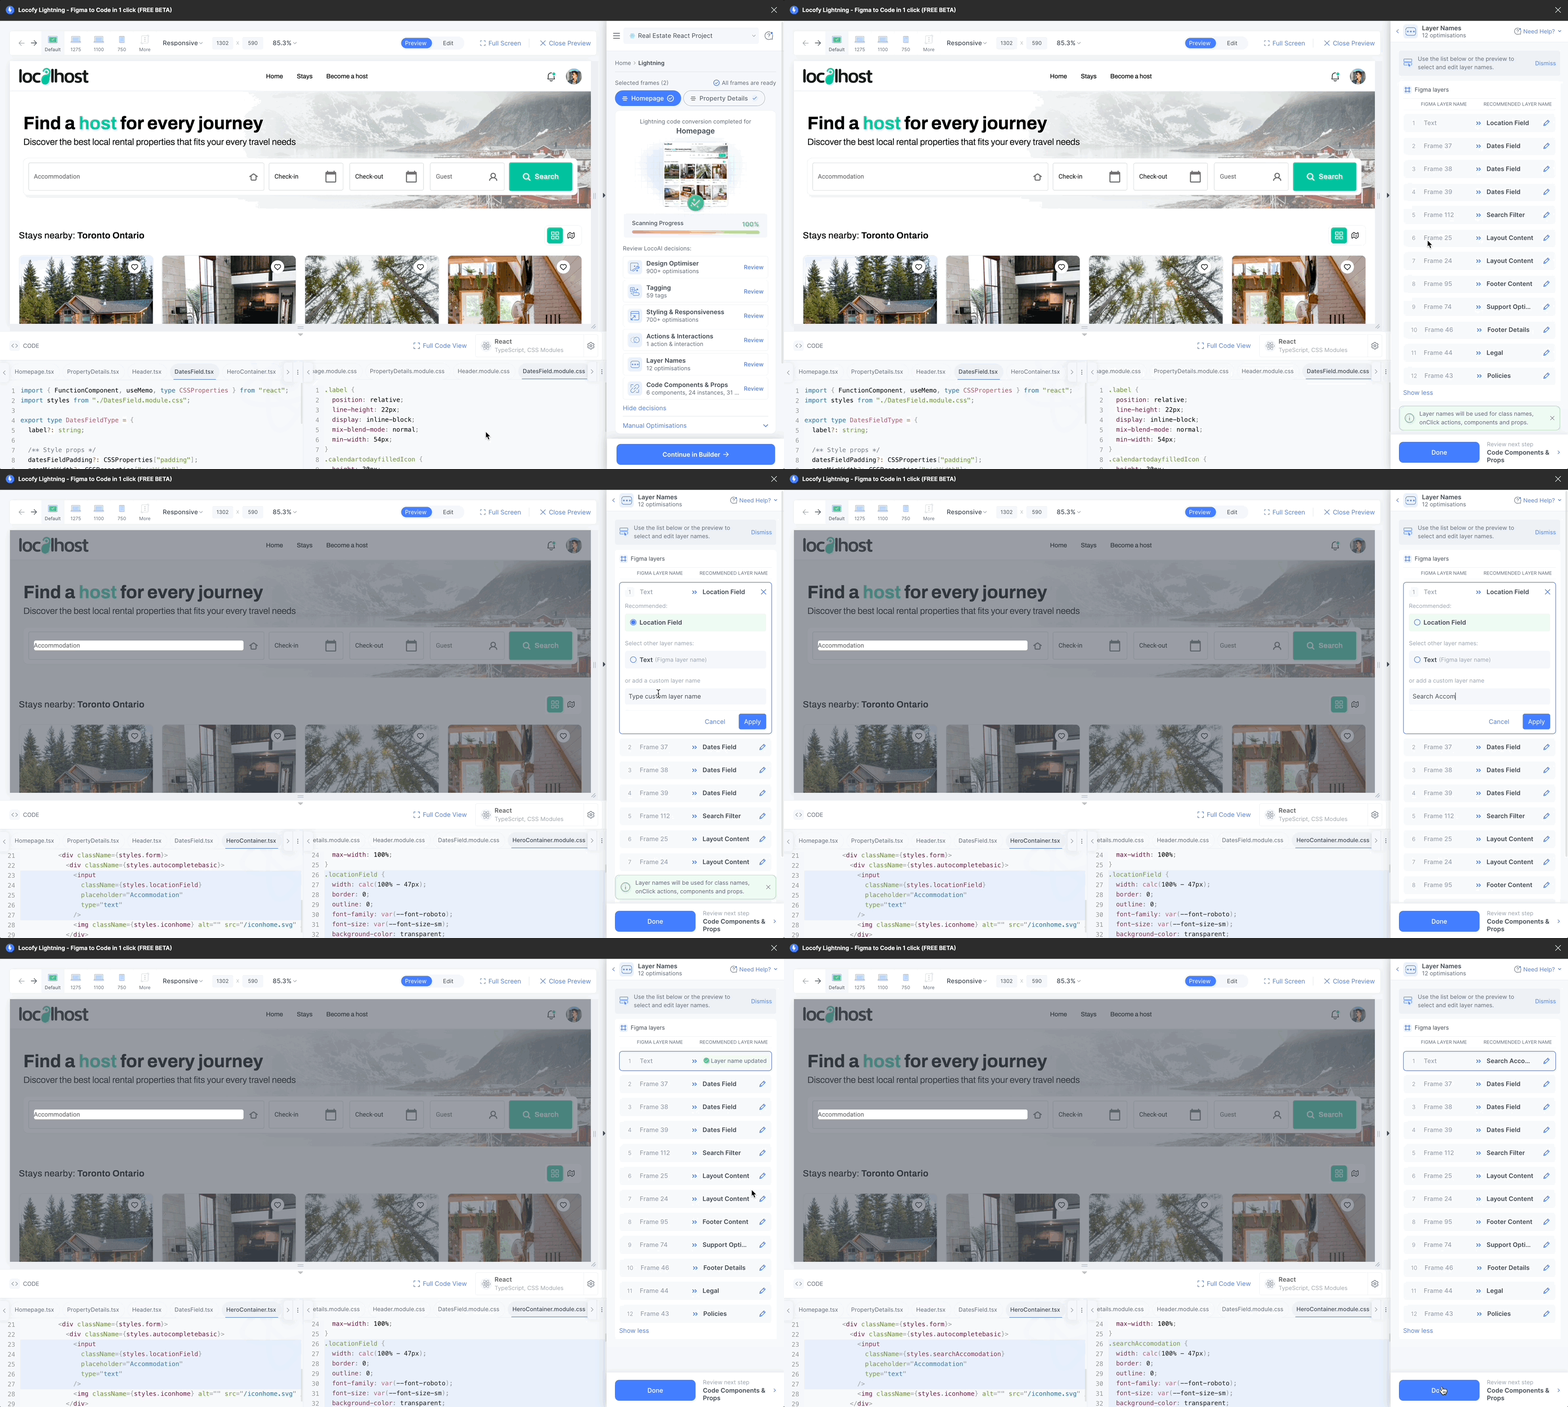
- Click on the edit button next to any of the layer names you want to edit.
- Choose the suggested layer name.

- Choose a custome layer name.

Select and Edit in Preview
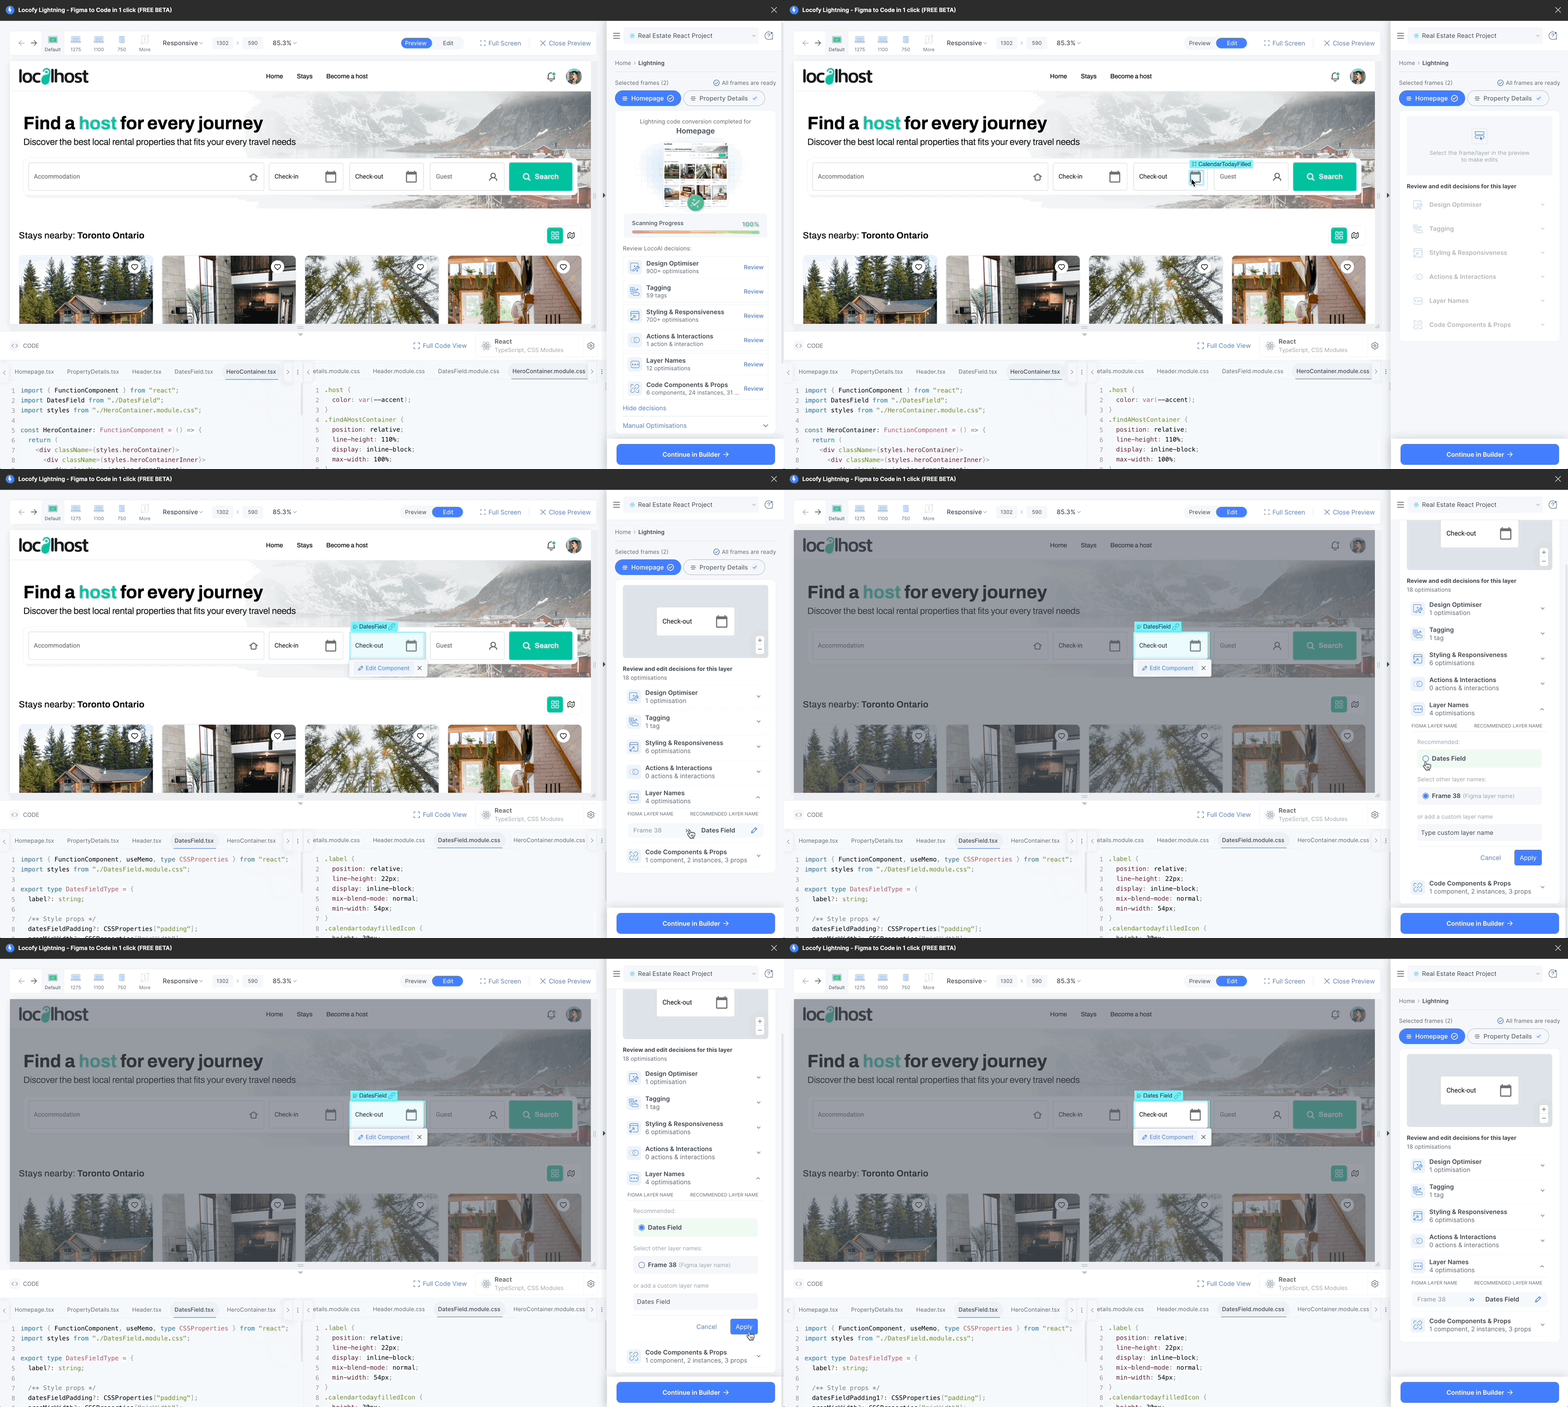
You can also view the layer name optimisations did for any particular element by selecting it directly from the preview.
- Click the 'Edit' tab on top of the preview window.
- You can now click the element in preview that you wish to edit. You can also hover over the element to see their name.
- Once the item is selected, you can review & edit the decisions LocoAI made, present on the right panel, with regards to the selected element.
