Locofy your design across multiple breakpoints
Locofy automatically detects and maps your website designs across various breakpoints in Figma. This ensures that your website looks consistent across devices, exactly as you have designed.
Prepare Your Design
There are a few things you need to do before using this feature
Don’t have a design ready? Check out our sample project (opens in a new tab) to get started.
-
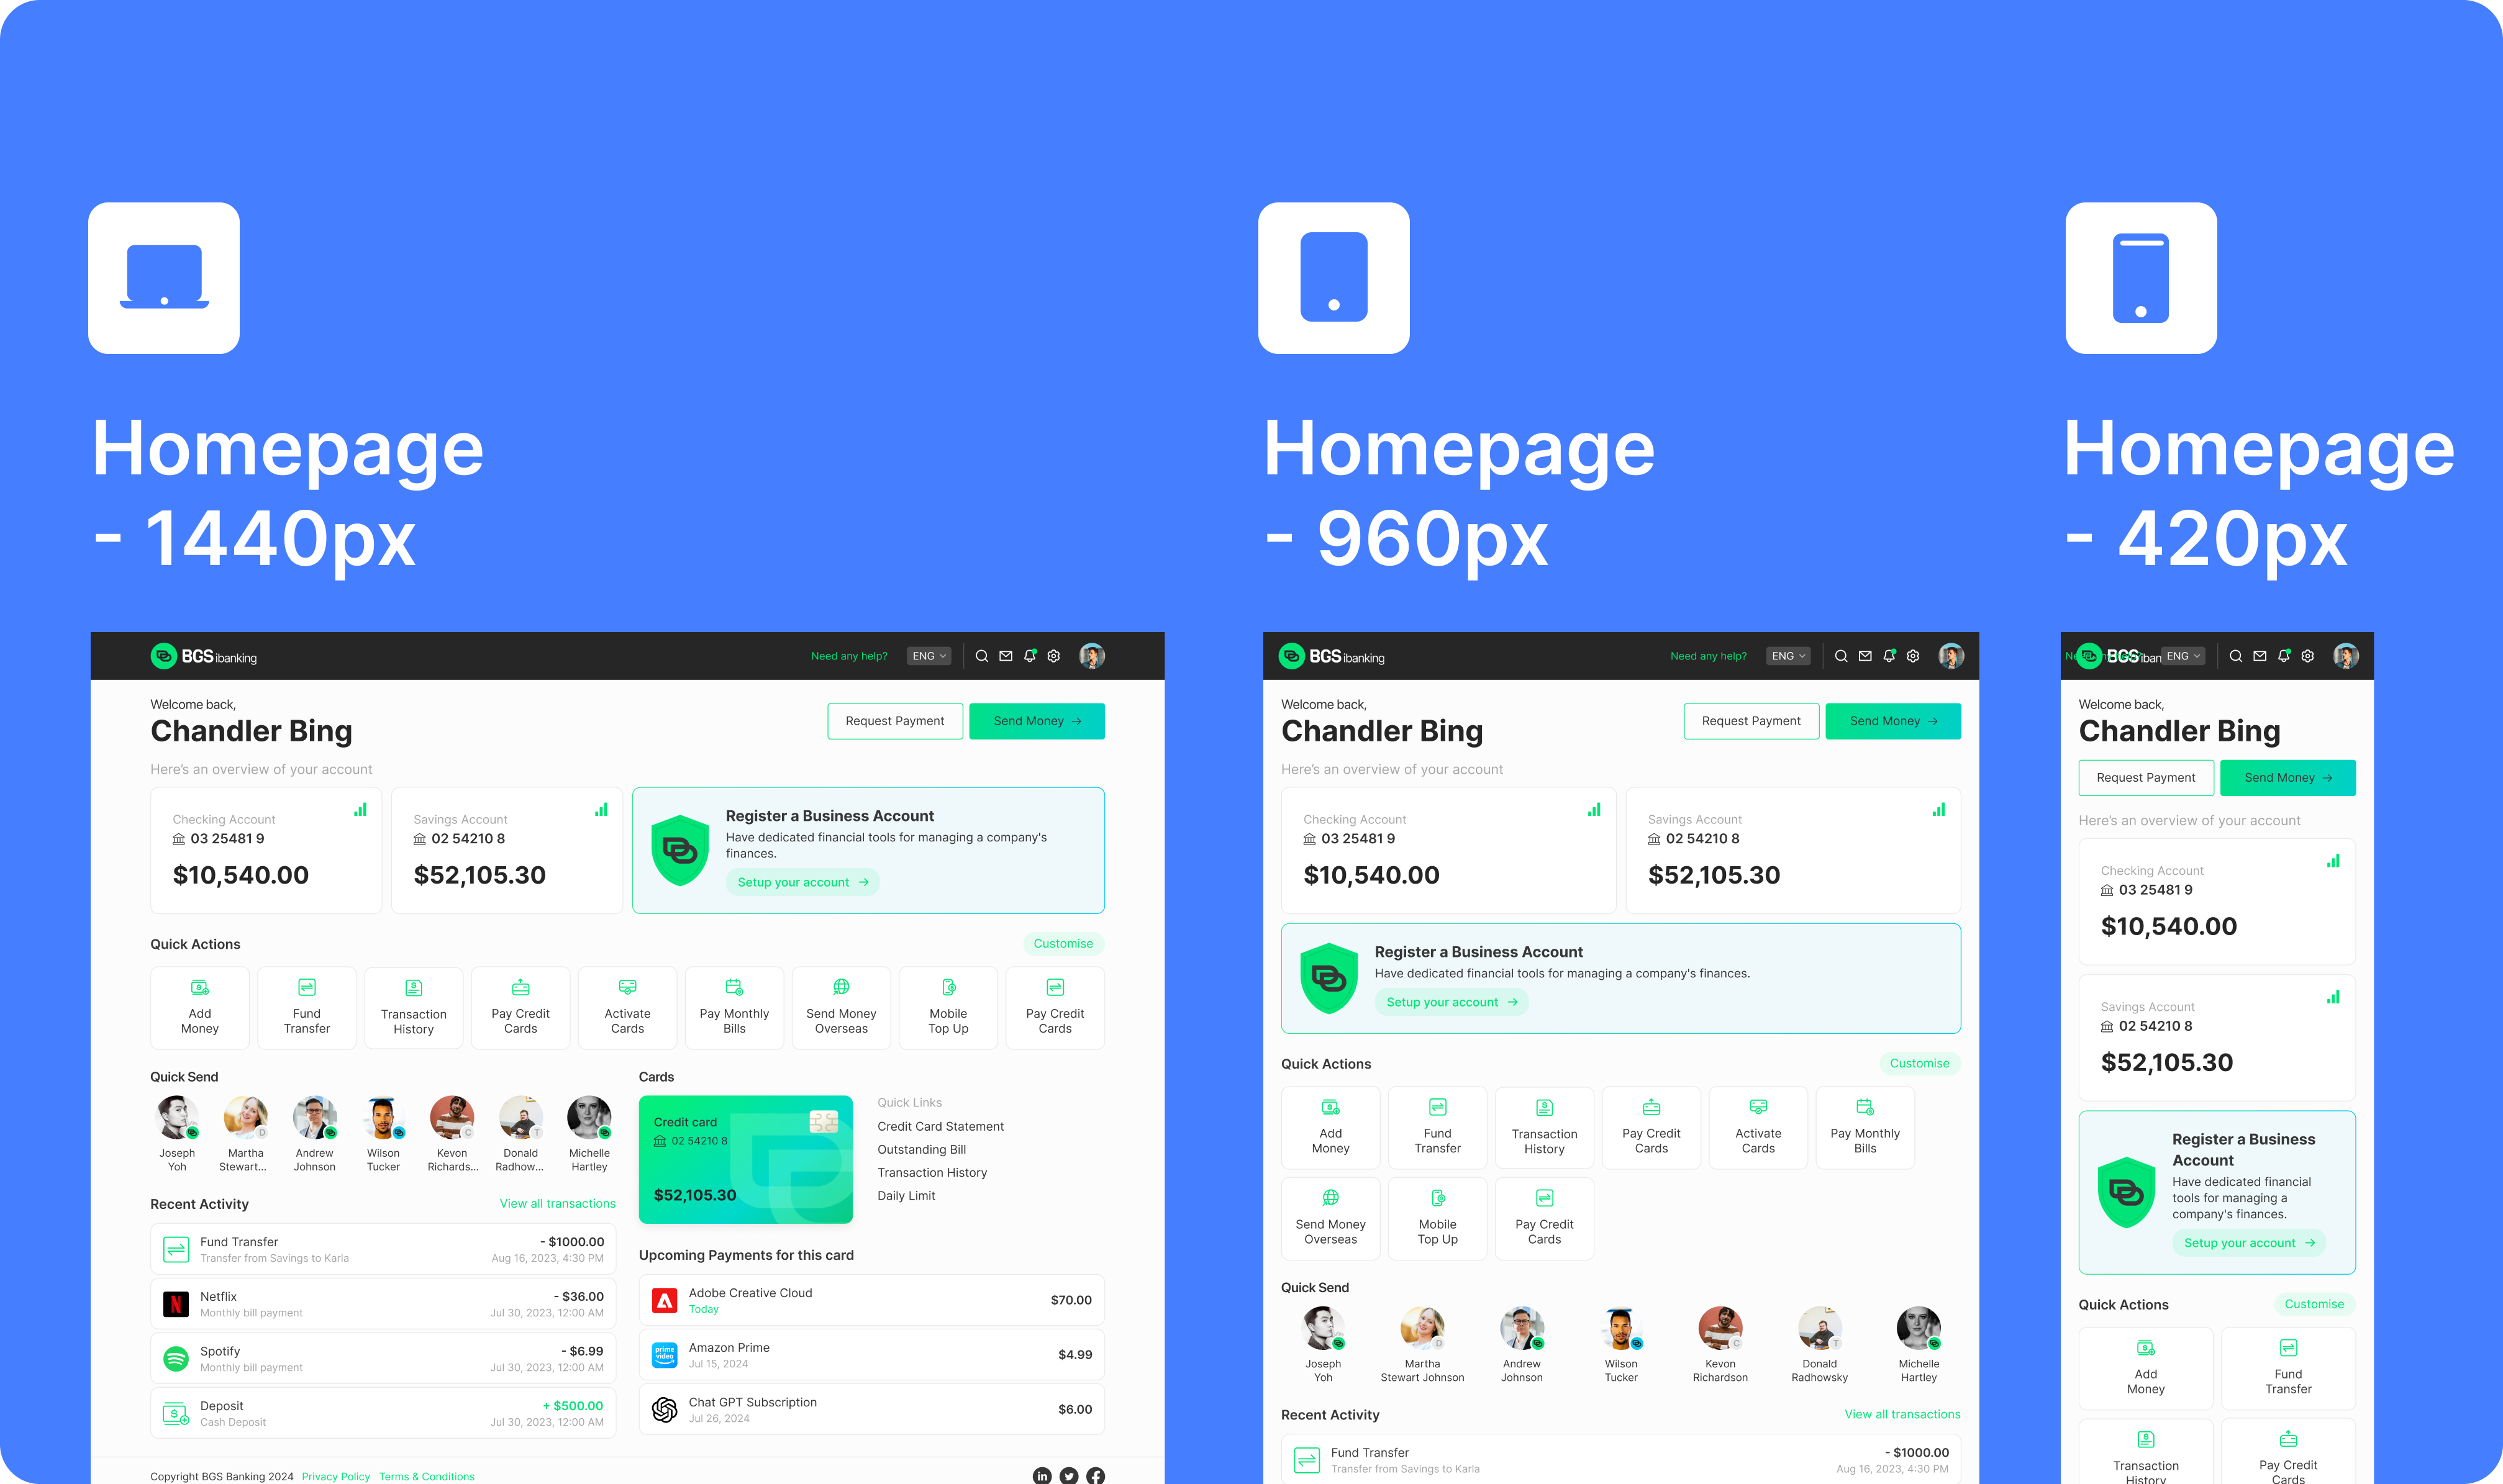
Follow Parent Frame Naming Conventions : Your breakpoint frames should all be properly named by following one of the naming conventions listed below.
- Name + Breakpoint: e.g.,
Homepage - Desktop,Homepage - Mobile. - Name + Pixel Width: e.g.,
Homepage - 1440px,Homepage - 420px.
- Name + Breakpoint: e.g.,
- Apply Auto-Layout to All Your Layers: This ensures that your website’s responsiveness is seamless, especially between breakpoints
- Ensure Identical Layer Names and Structure: When designing multiple breakpoints to ensure that identical layers between each breakpoint have the same layer name and structure, an easy way to do this is to duplicate identical layers across each breakpoint and use auto layout to alter the layout. You can also use component properties to define different layouts for each breakpoint. And use boolean properties to show/hide child layers.

Automatically Mapping Breakpoints
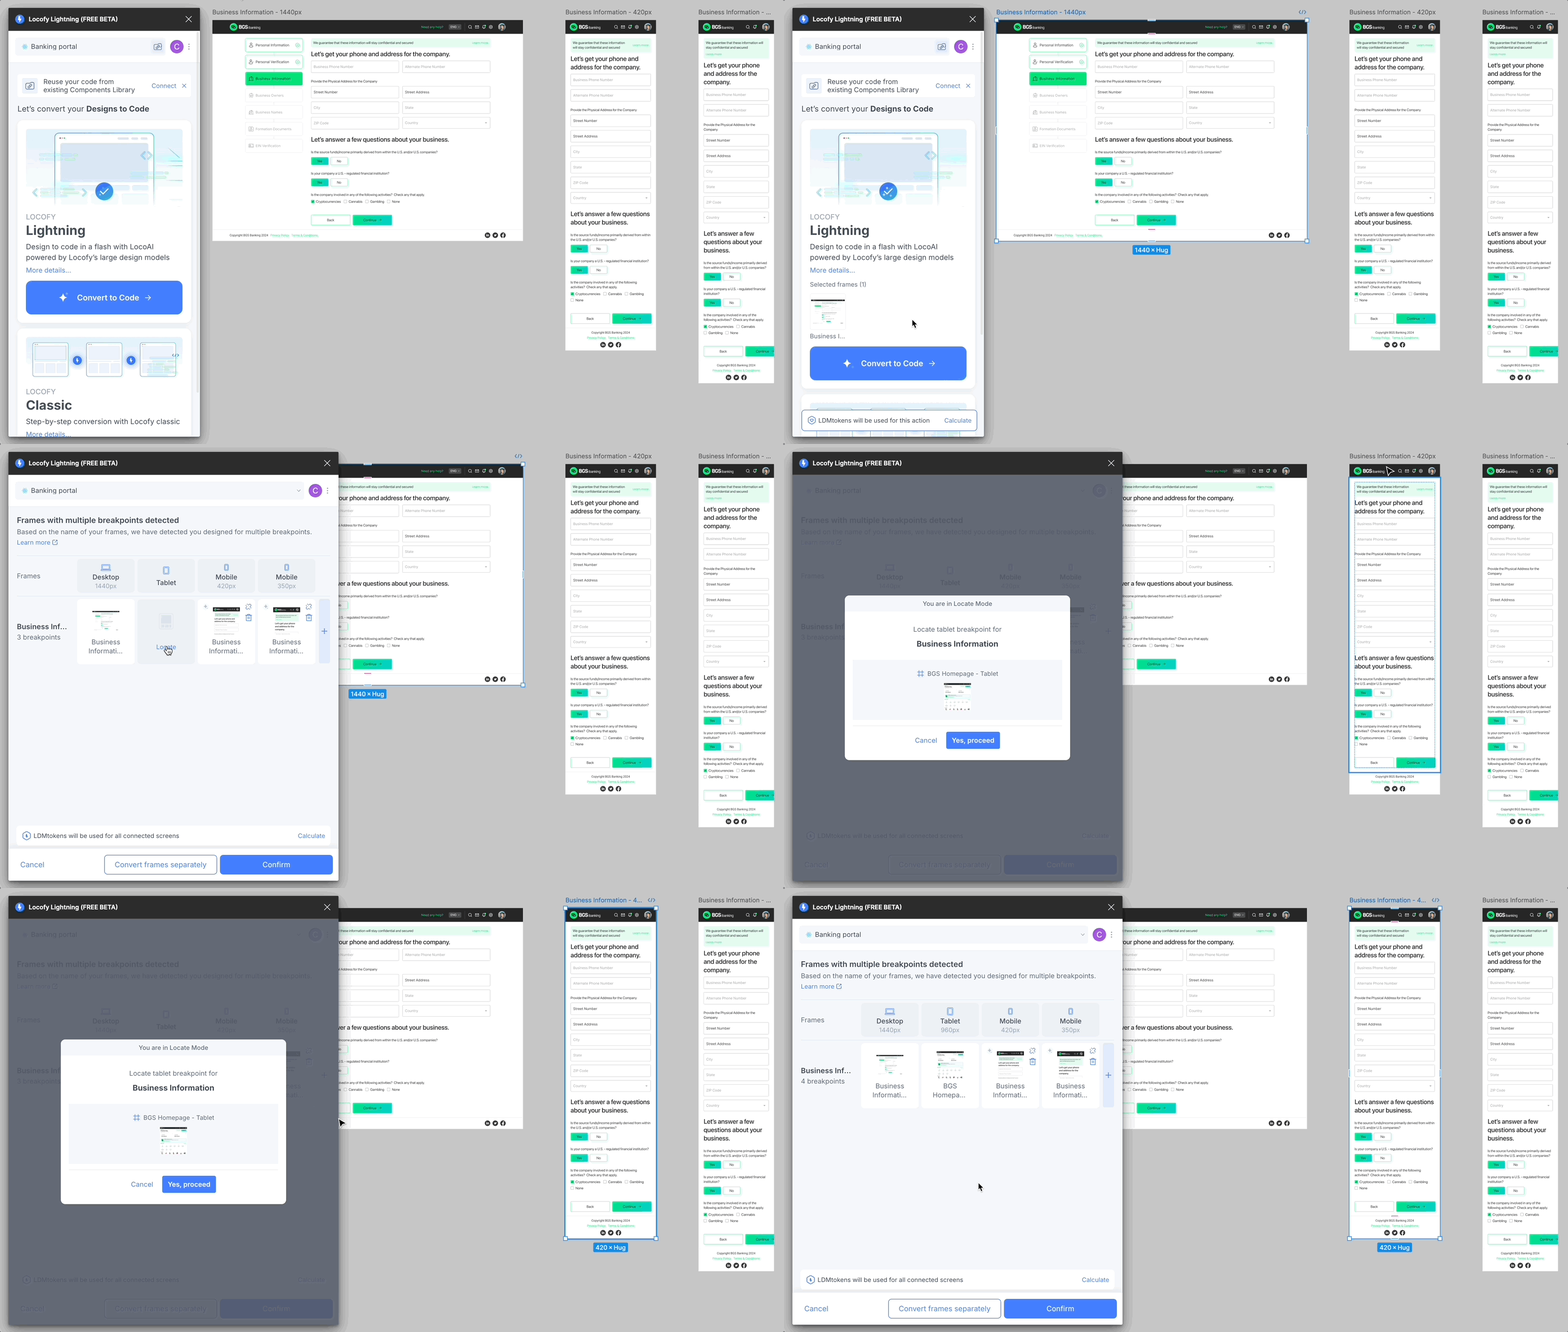
- Select Frames to Locofy
- Open the Locofy plugin in Figma.
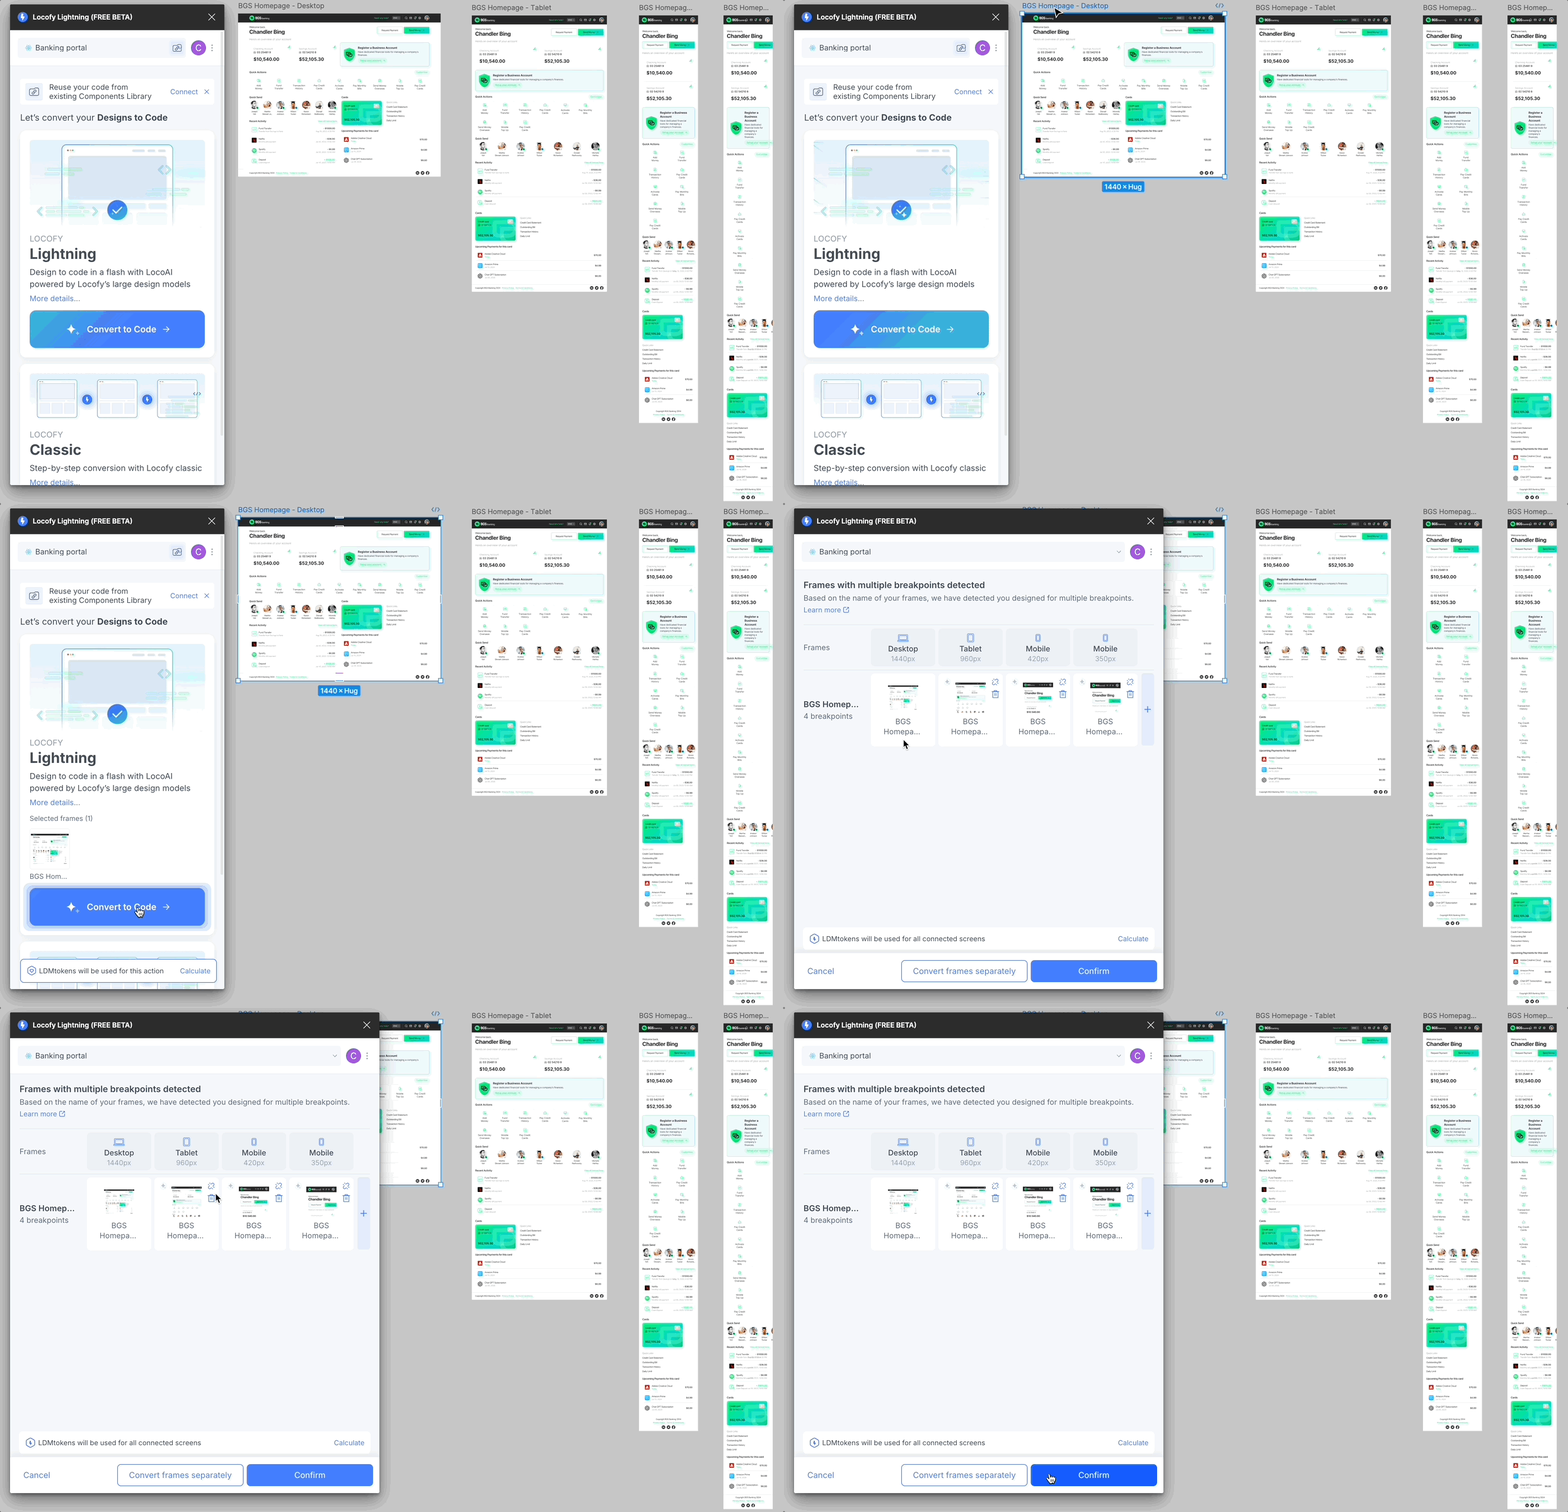
- Select the breakpoint frames you want to convert to code. You don’t have to select all the breakpoint frames; Locofy will automatically detect the corresponding breakpoint frames.
For example, if you have the following frames: “Homepage - Desktop,” “Homepage - Tablet,” and “Homepage - Mobile,” and you only select “Homepage - Desktop,” Locofy will automatically detect and map the other two breakpoint frames because of the naming convention.
-
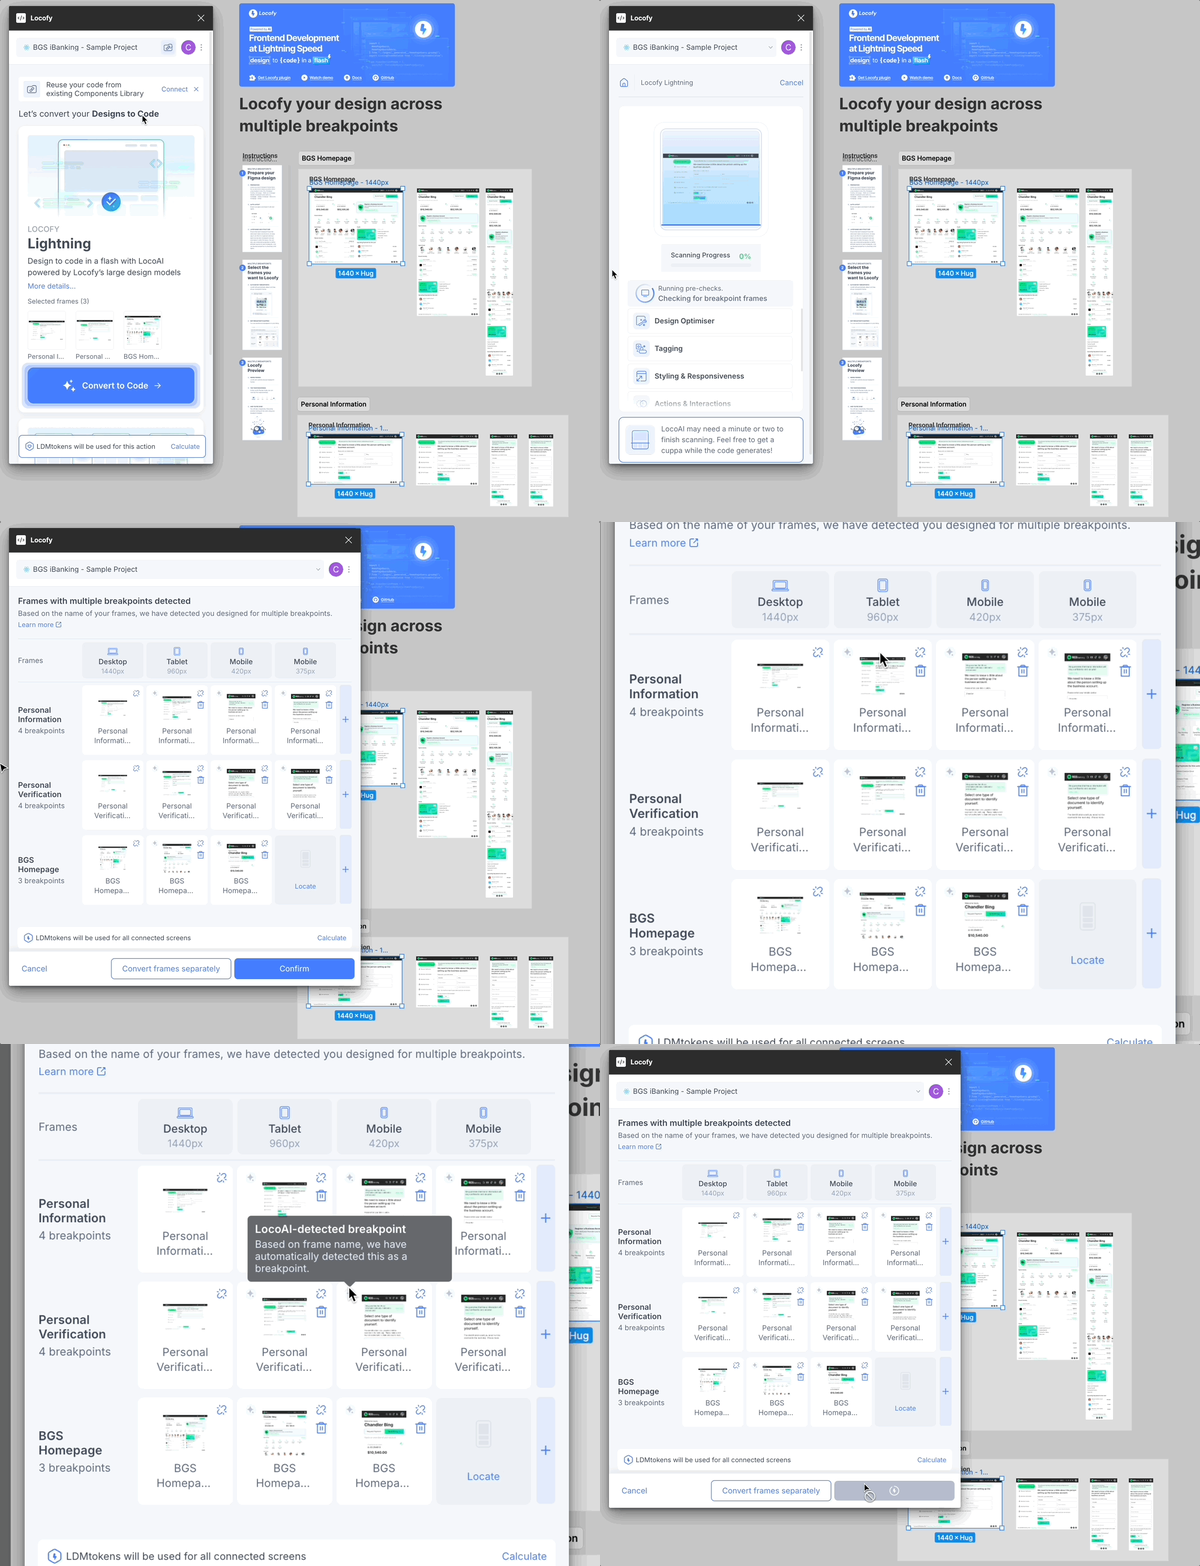
Automatic Mapping
- All breakpoints (desktop, tablet, mobile) will be grouped under one parent frame.
- Columns will display the breakpoints detected for each frame.
-
Locating More Breakpoints: In the event that Locofy doesn’t automatically detect your breakpoint frames, you can manually add them.
- Use the + button to add more breakpoints.
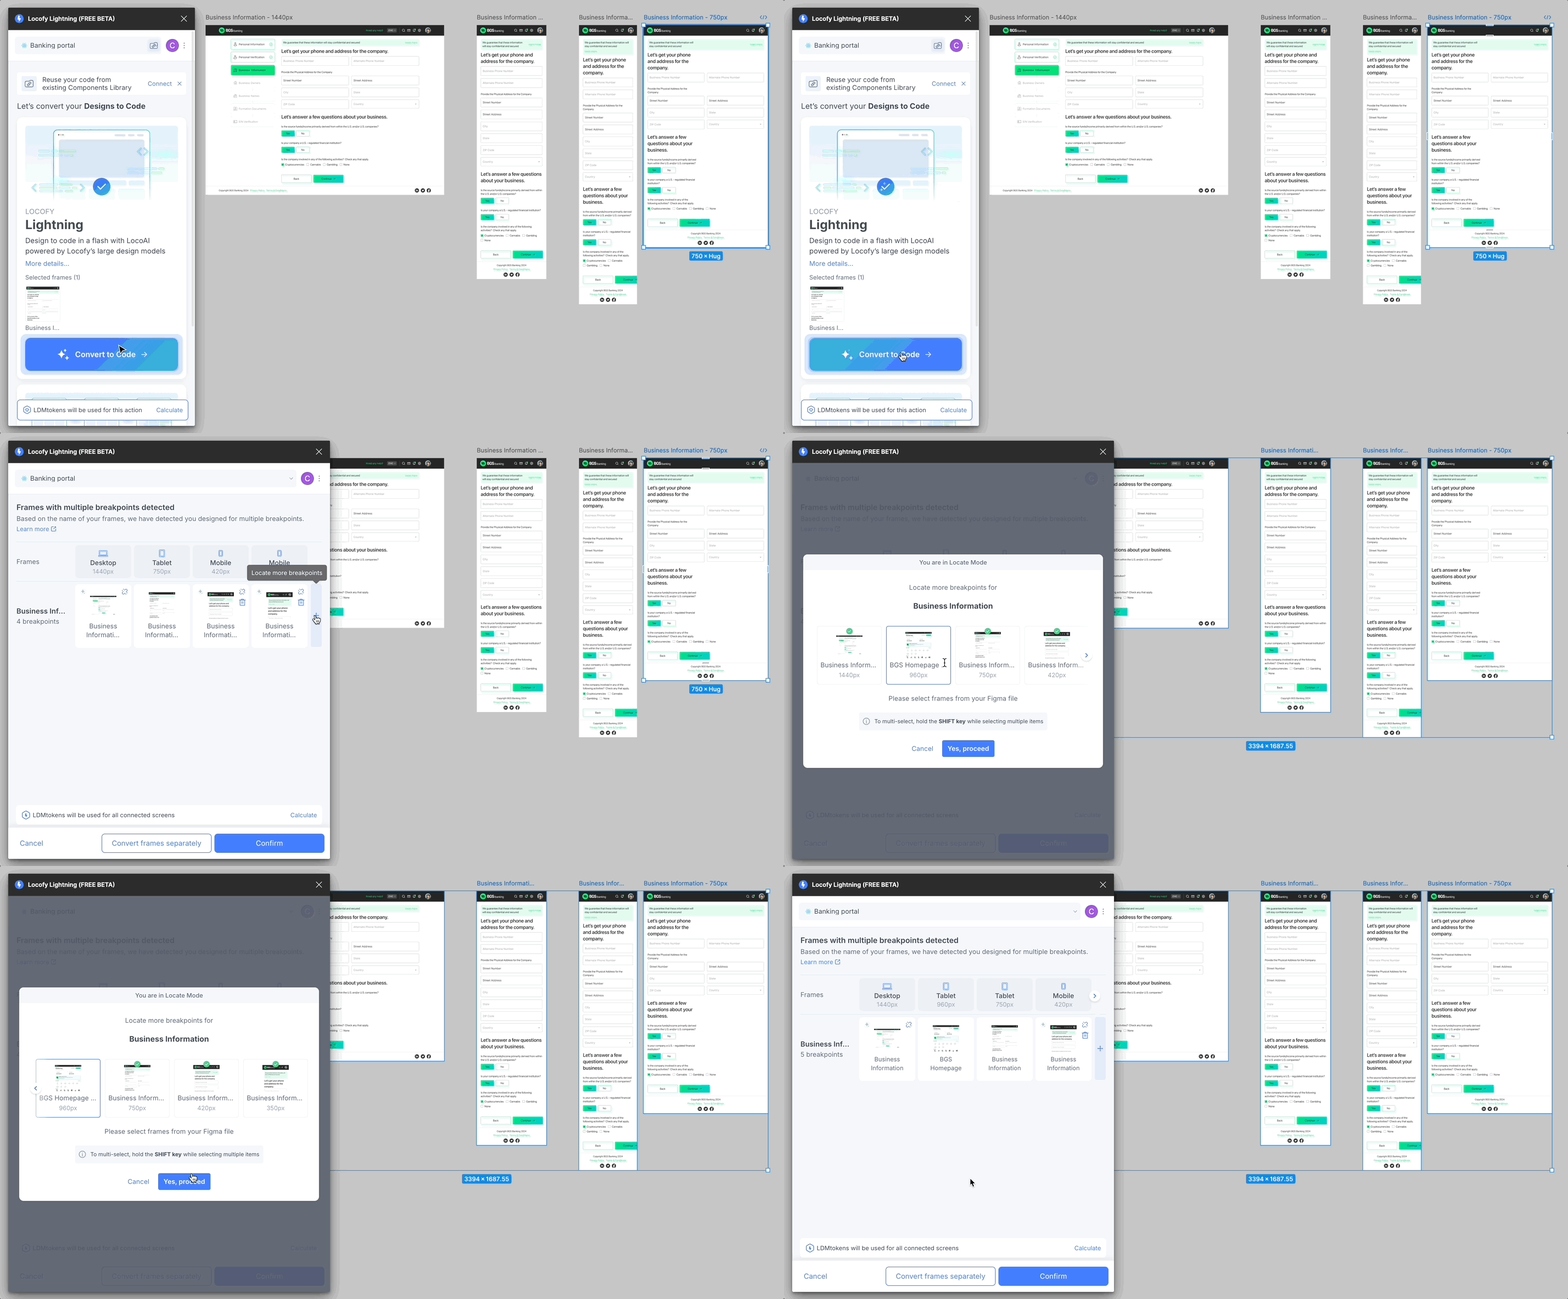
- Use the Locate button to find missing breakpoint frames.
Understanding Icons and Actions
- Spark Icon: Indicates frames automatically detected by LocoAI.
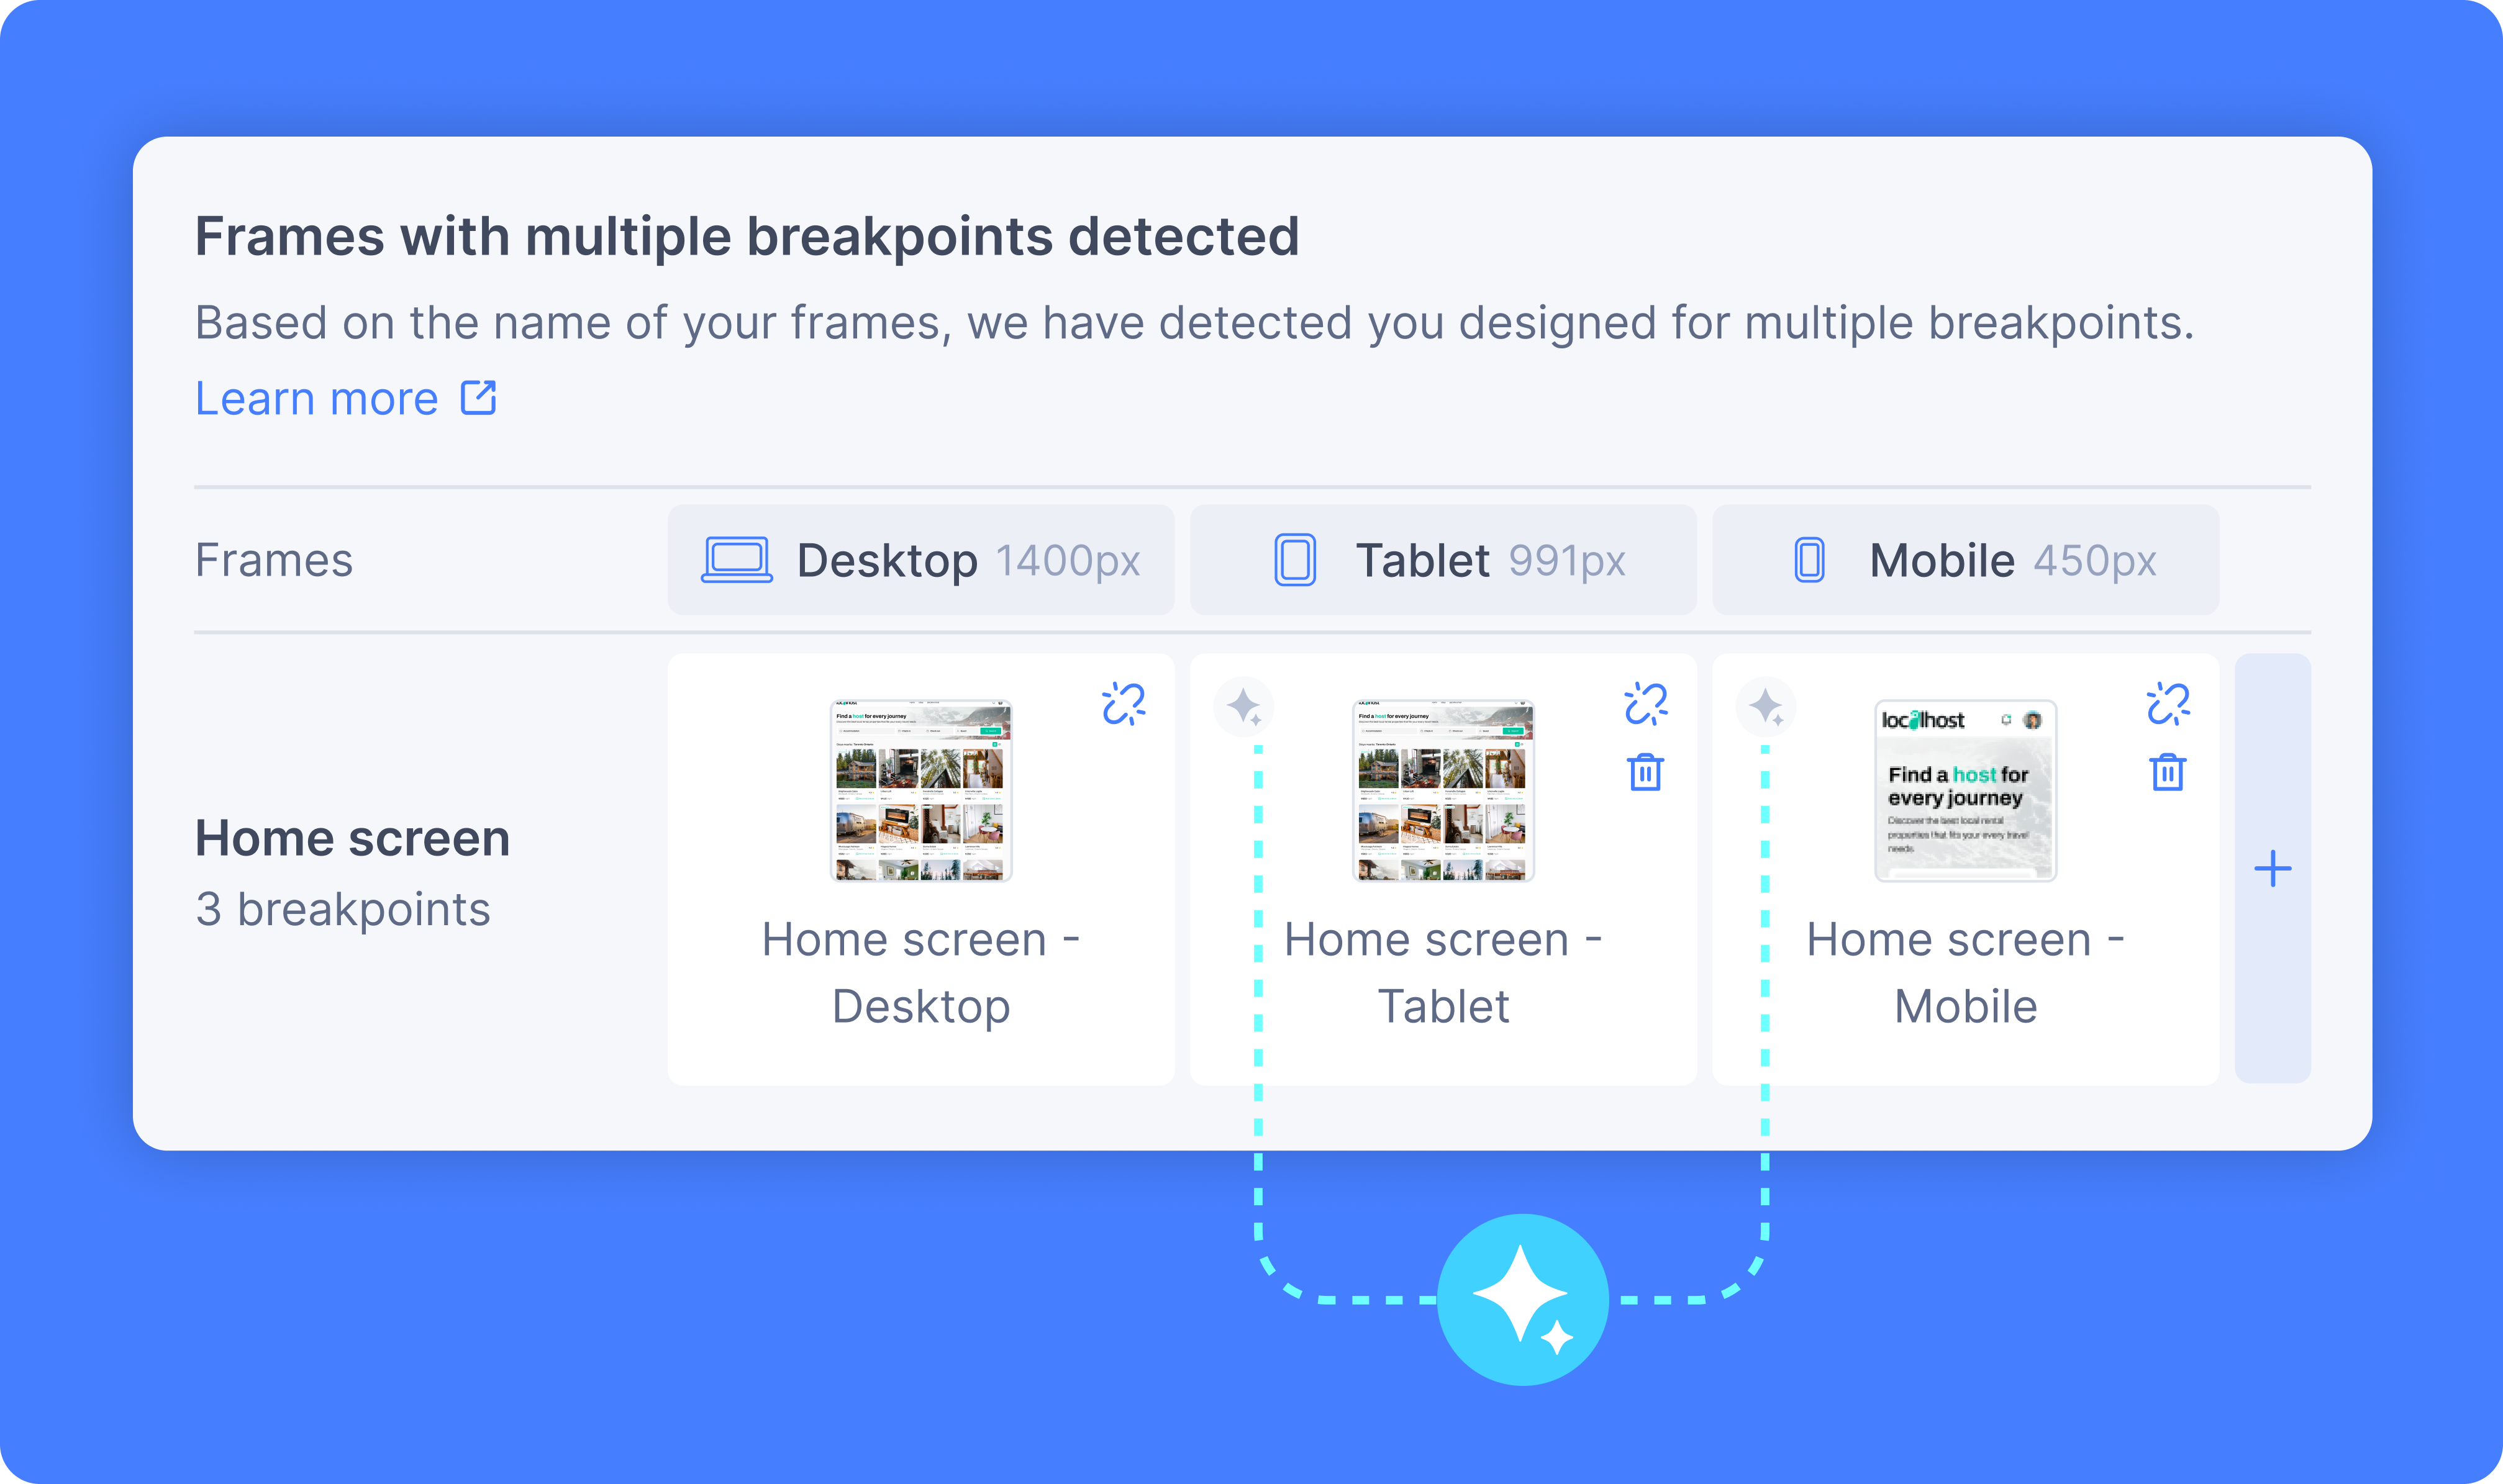
- Actions:
- Decouple: Ungroups a frame to create a new row.
- Delete: Removes a frame from code conversion.
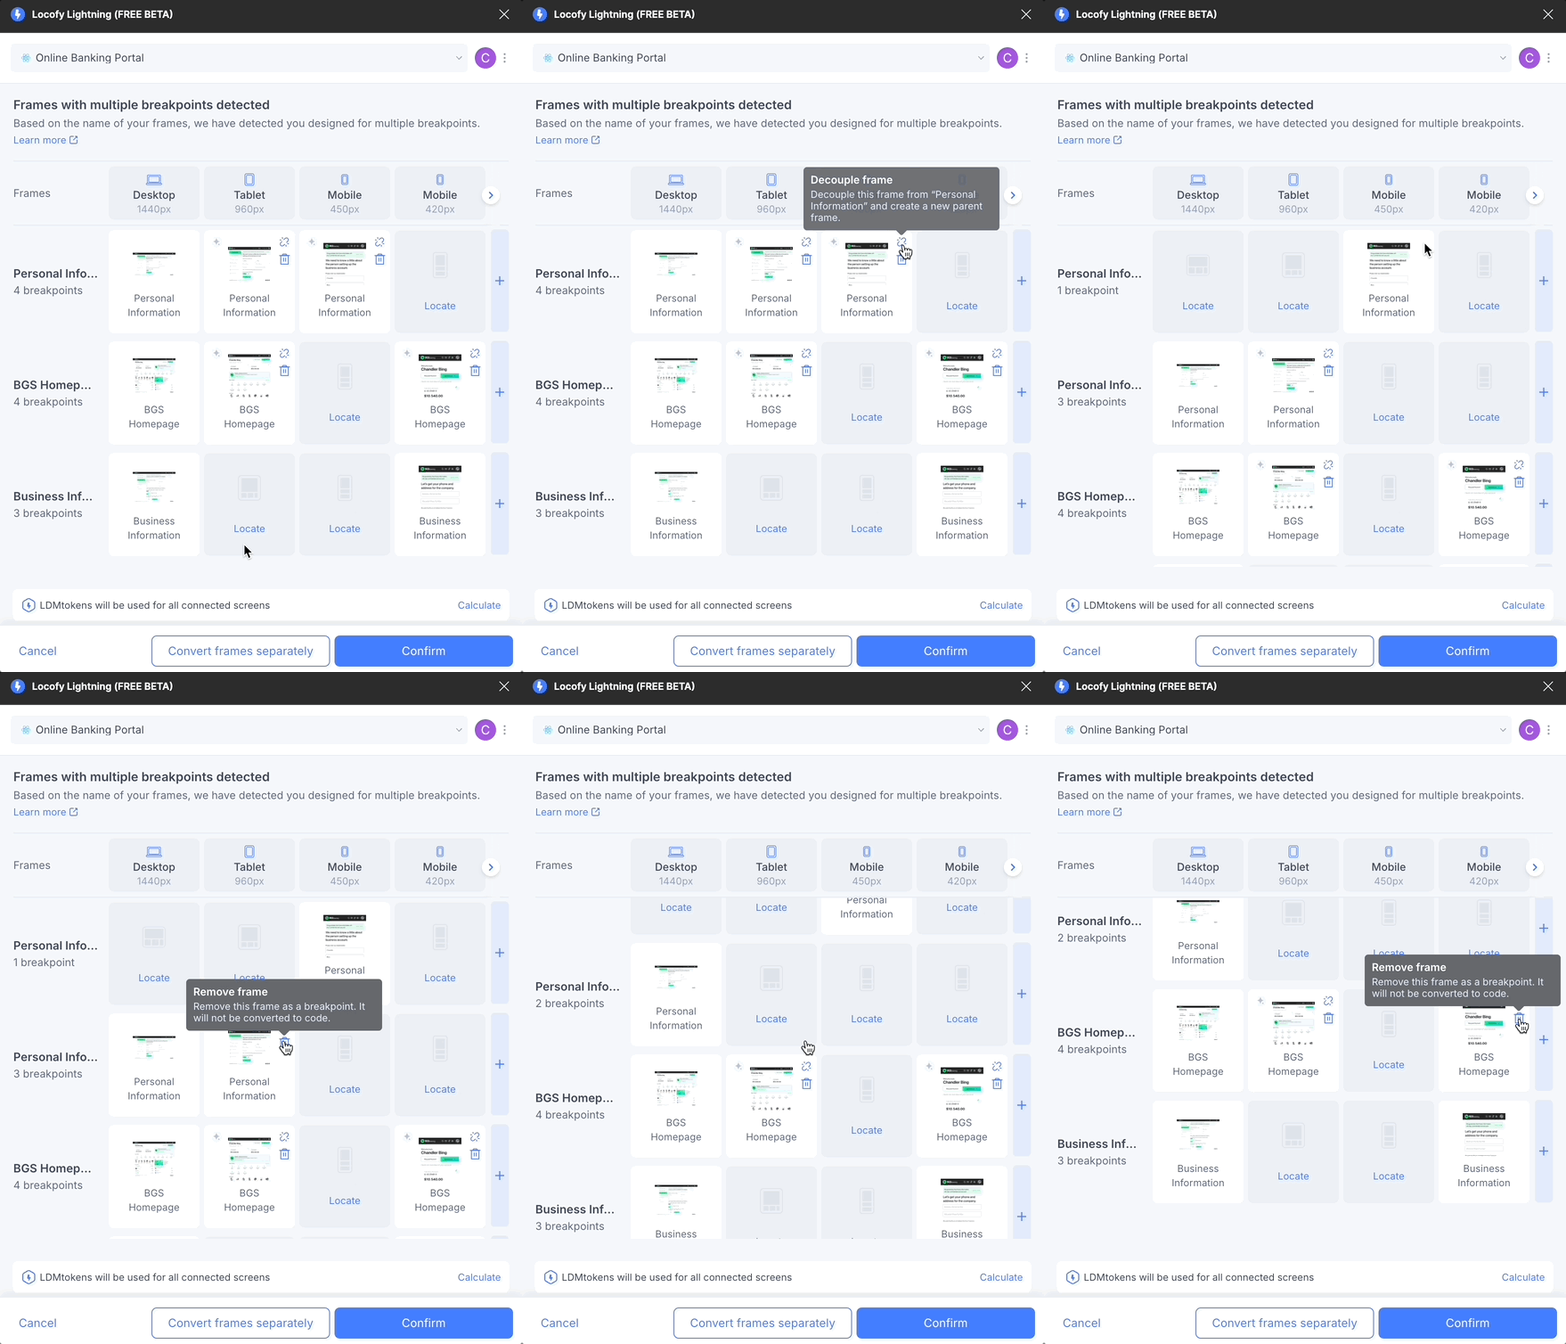
If LocoAI incorrectly detects a frame, double-check your naming parent frame naming and follow the recommended naming conventions mentioned at the top of the doc.
Finalizing and Previewing Your Design
- Complete the Setup
- Ensure all your breakpoint frames are detected and mapped.
- Click on the confirm button to continue converting your design to code
- Locofy Preview
- Test the responsiveness of your design directly in Locofy.
- Compare the converted output with your Figma design to confirm accuracy.
