Tagging
In this step, Locofy.ai uses its Tagging feature to turn static layers on your Figma design files into interactive functional buttons, input fields, videos, iFrames and more by using the appropriate HTML tag to make the element interactive & semantically correct.
In the Lightning flow, we scan your designs and use AI to auto-tag your design elements for a faster workflow.
Switching from Preview Mode to Edit Mode
When you first open your project, it starts in Preview Mode, allowing you to view how your design looks and functions. To begin editing, click the "Edit" button in the top toolbar. This will switch the interface to Edit Mode, where you can access all the features and settings needed to modify your project.
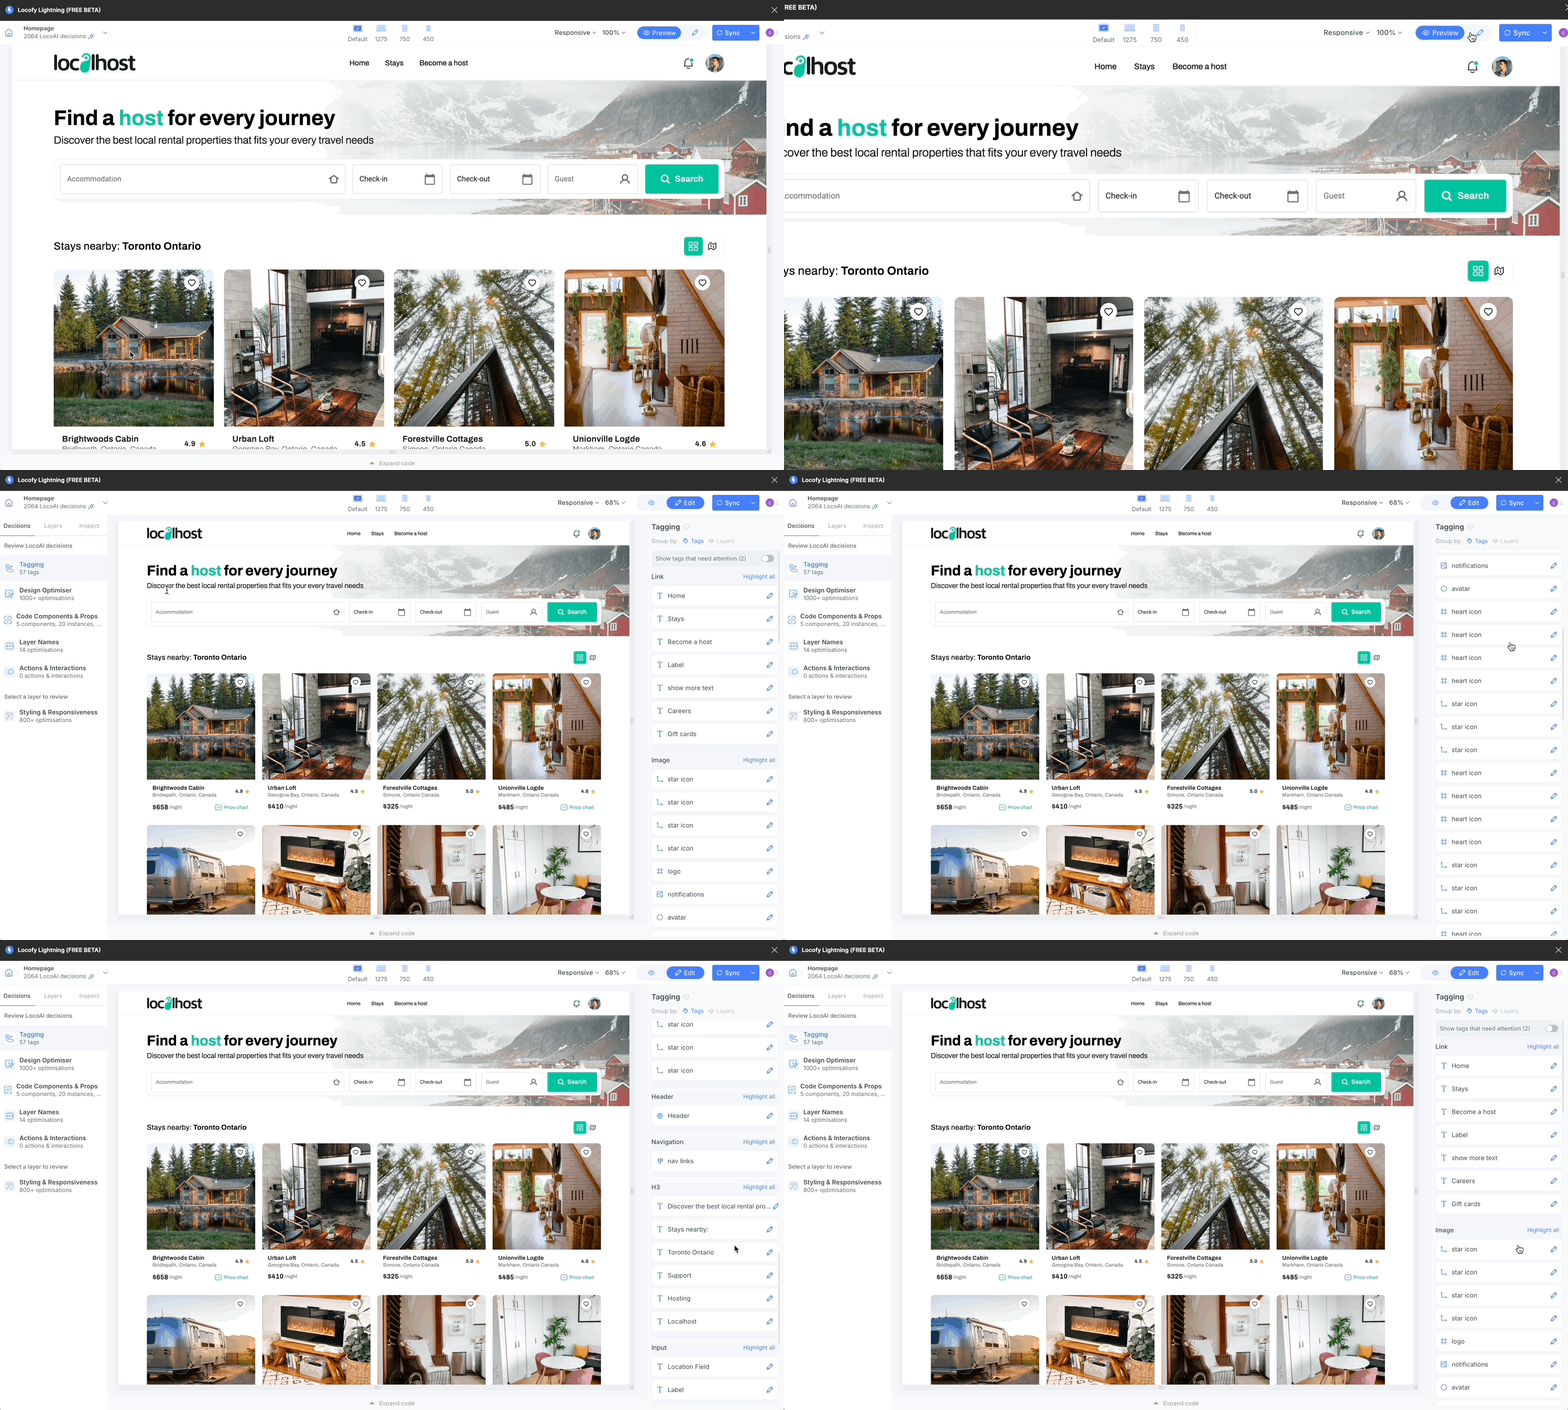
You can return to Preview Mode anytime by clicking the "Preview" button, enabling you to check your changes in real time.
Reviewing Auto-Tagged Elements
After the Locofy.ai wizard has scanned & converted your designs to code, you can review the elements we have tagged and change them.
-
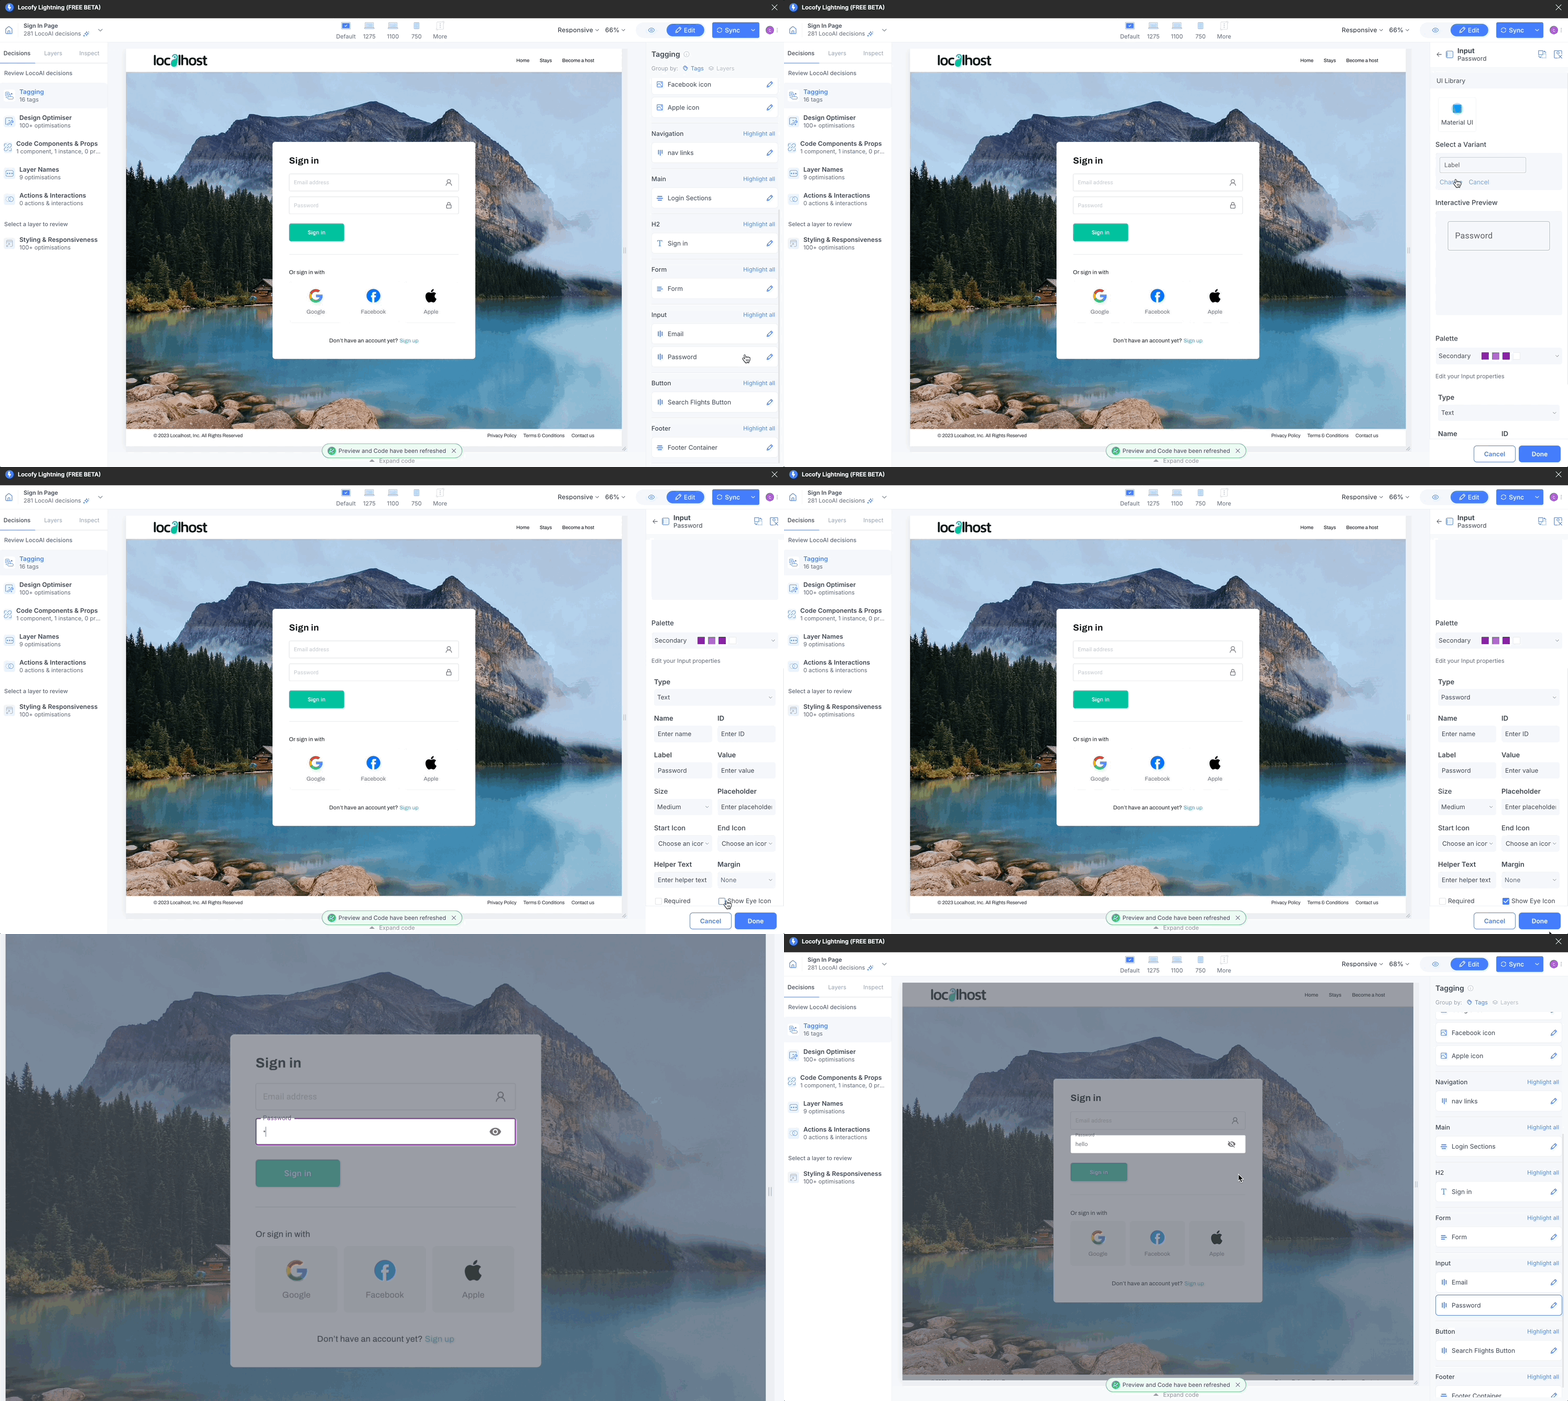
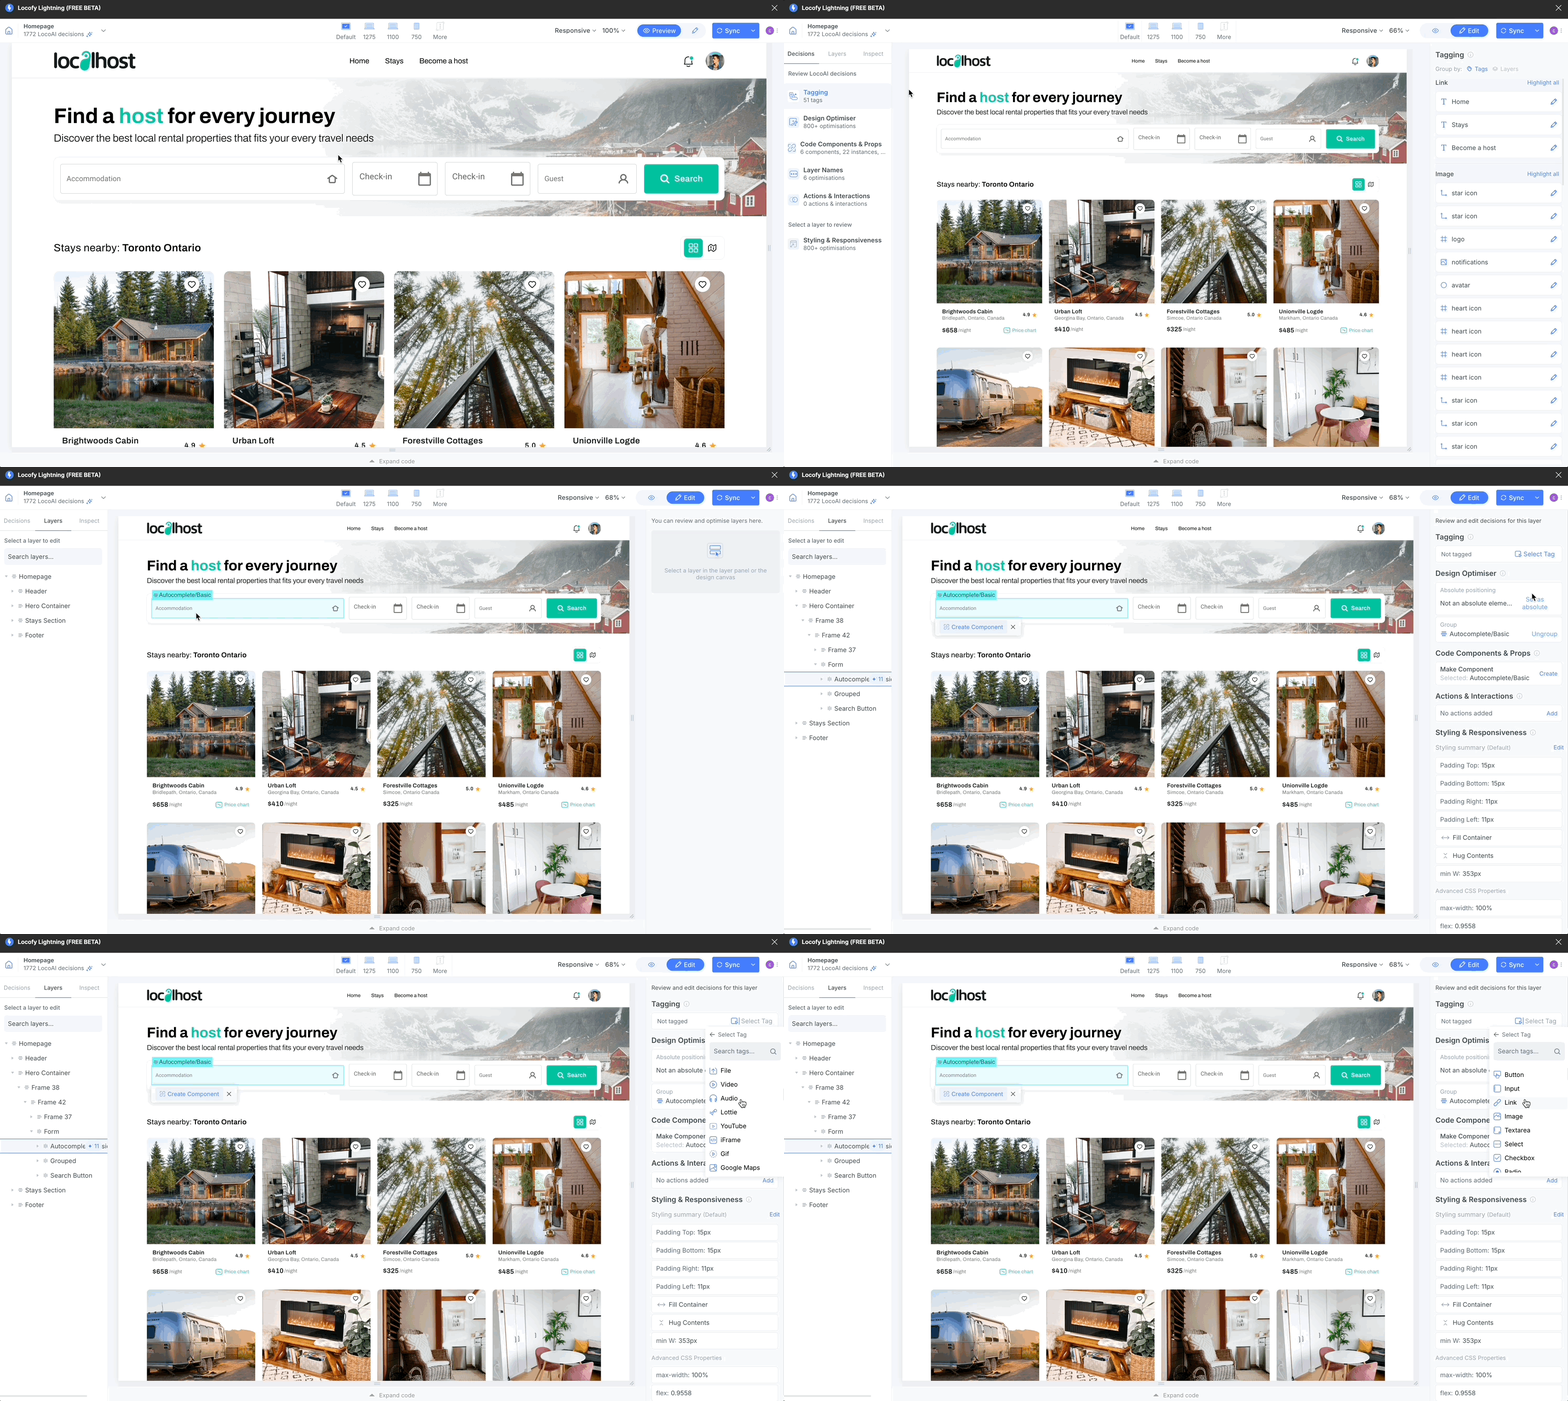
Click on the Edit button under the Decisions tab click on "Tagging".
-
Now you can see the tags we have used in the code and for which frames.
-
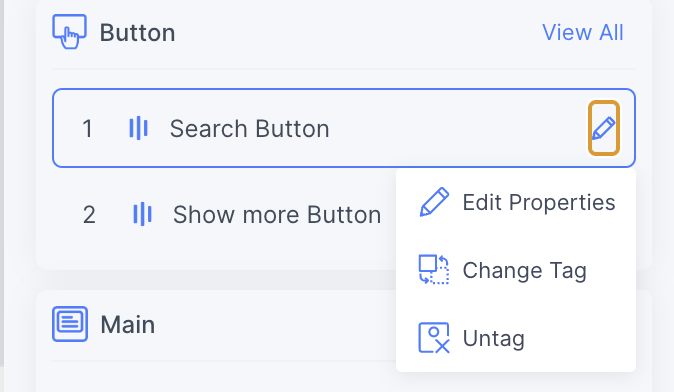
You can click on "Select" to see the element on the preview. You can also click on the edit button for any of the frames that we have auto-tagged to edit its properties, changing the tag, or untagging it.
Tags That Need Your Attention
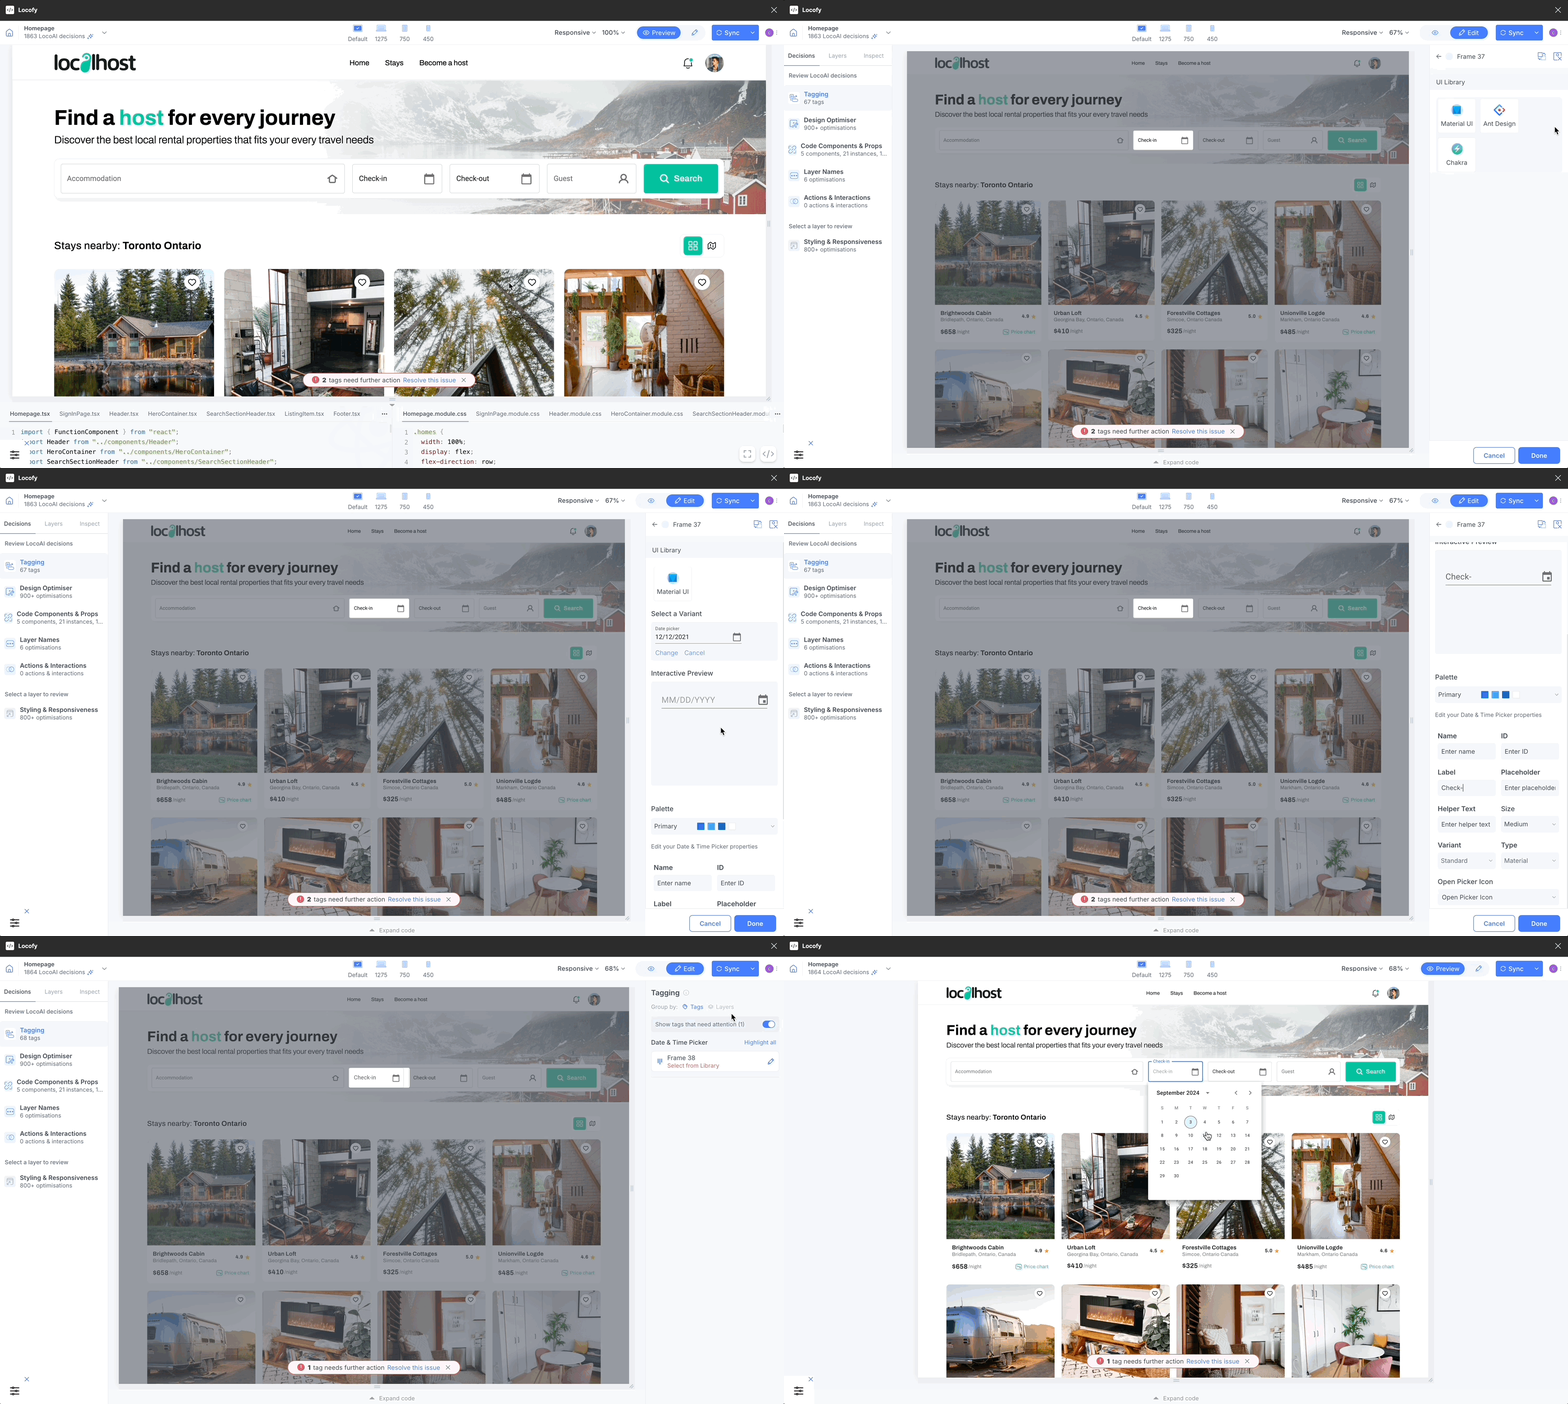
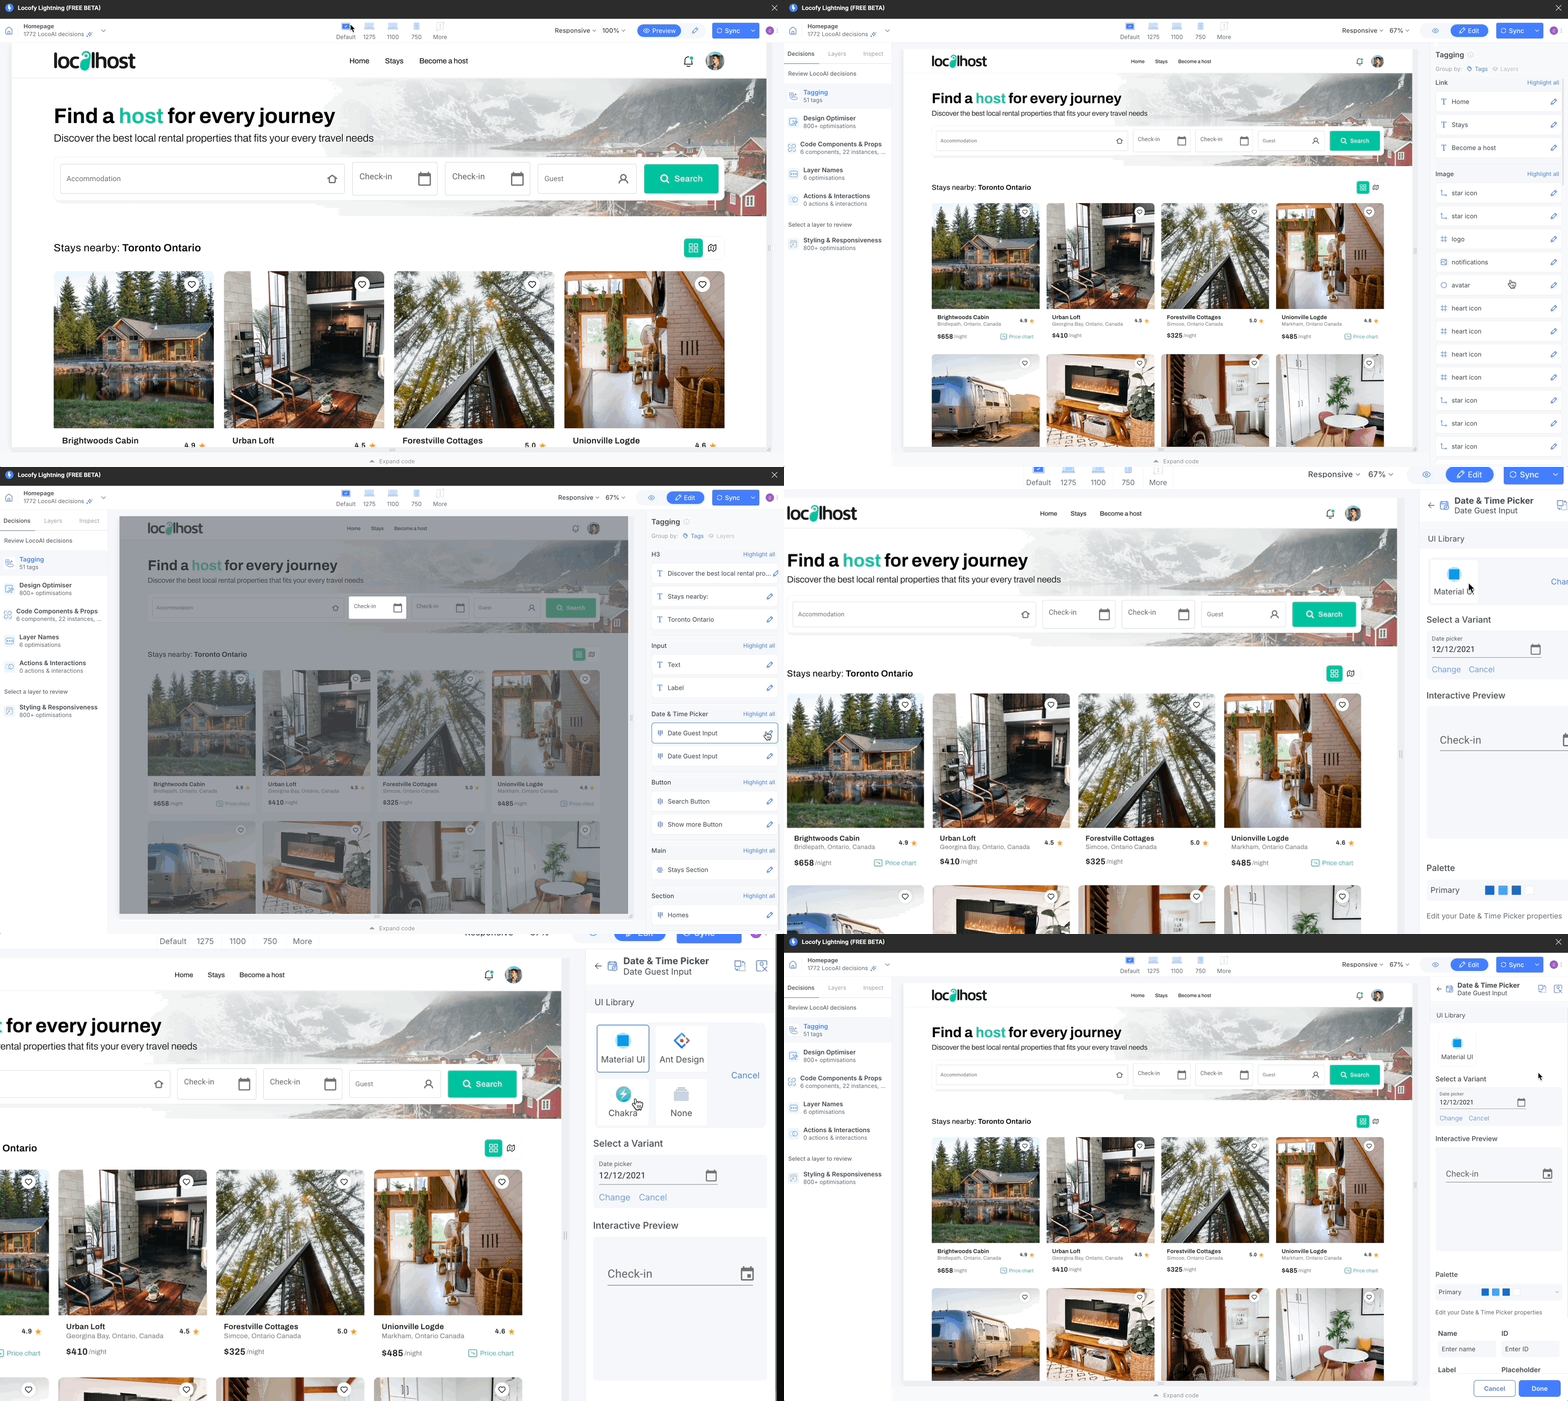
For some custom elements such as date pickers & auto complete fields, we rely on you to choose the correct the UI framework for these elements.
-
After the preview is loaded, you will see a toast at the bottom asking you to resolve the issue.
-
You can click on 'Resolve this issue' to see the tags, on the right panel, that need your attention.
-
Finally, you can click on them and select the apt UI library.
Select and Edit in Preview
You can select the element you wish to tag directly from the preview.
-
Click the 'Edit' tab on top of the preview window.
-
Go to the Layers tab and select the desired layer or click on the preview to edit the element.
-
Once the item is selected, you can review & edit the decisions LocoAI made, present on the right panel, with regards to the selected element.
Editing Properties
Once you click on the "Edit Properties" button, you will see the different properties you can edit depending upon the tag.
Change Tag
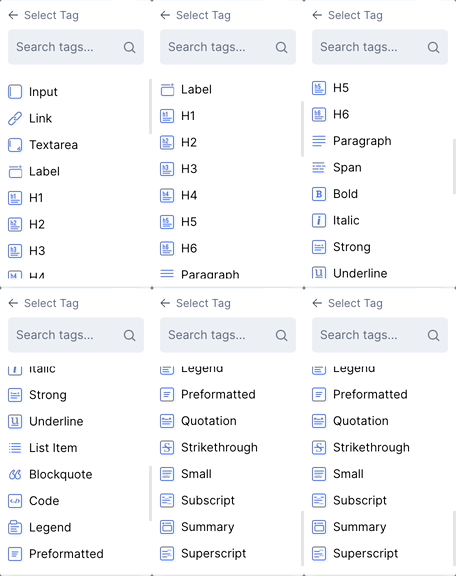
When you click on the "Change Tag" option, a menu of tags will be opened for you to easily go through the available tags and select the relevant one. You can also search through the tags.
Working with UI libraries
For some tags such as Button and Input, we allow you to choose whether we should use the vanilla HTML tag or import the component from a UI library such Material or Chakra.
Following are the UI libraries that we support:
- Material UI
- Chakra UI
- Ant Design
- Bootstrap UI
- Vuetify
Untag
You can untag a tag which was previously tagged by clicking “Untag”.
Manually Tagging Elements
Tagging elements manually is a great option for some use cases such as:
- Want granular control over the HTML tags used in the genereated code
- You have specific SEO requirements
You can tag elements manually as well in the Lightning flow after the Locofy.ai wizard has scanned & generated the code, you can tag more elements.
To do so, follow the steps below:
-
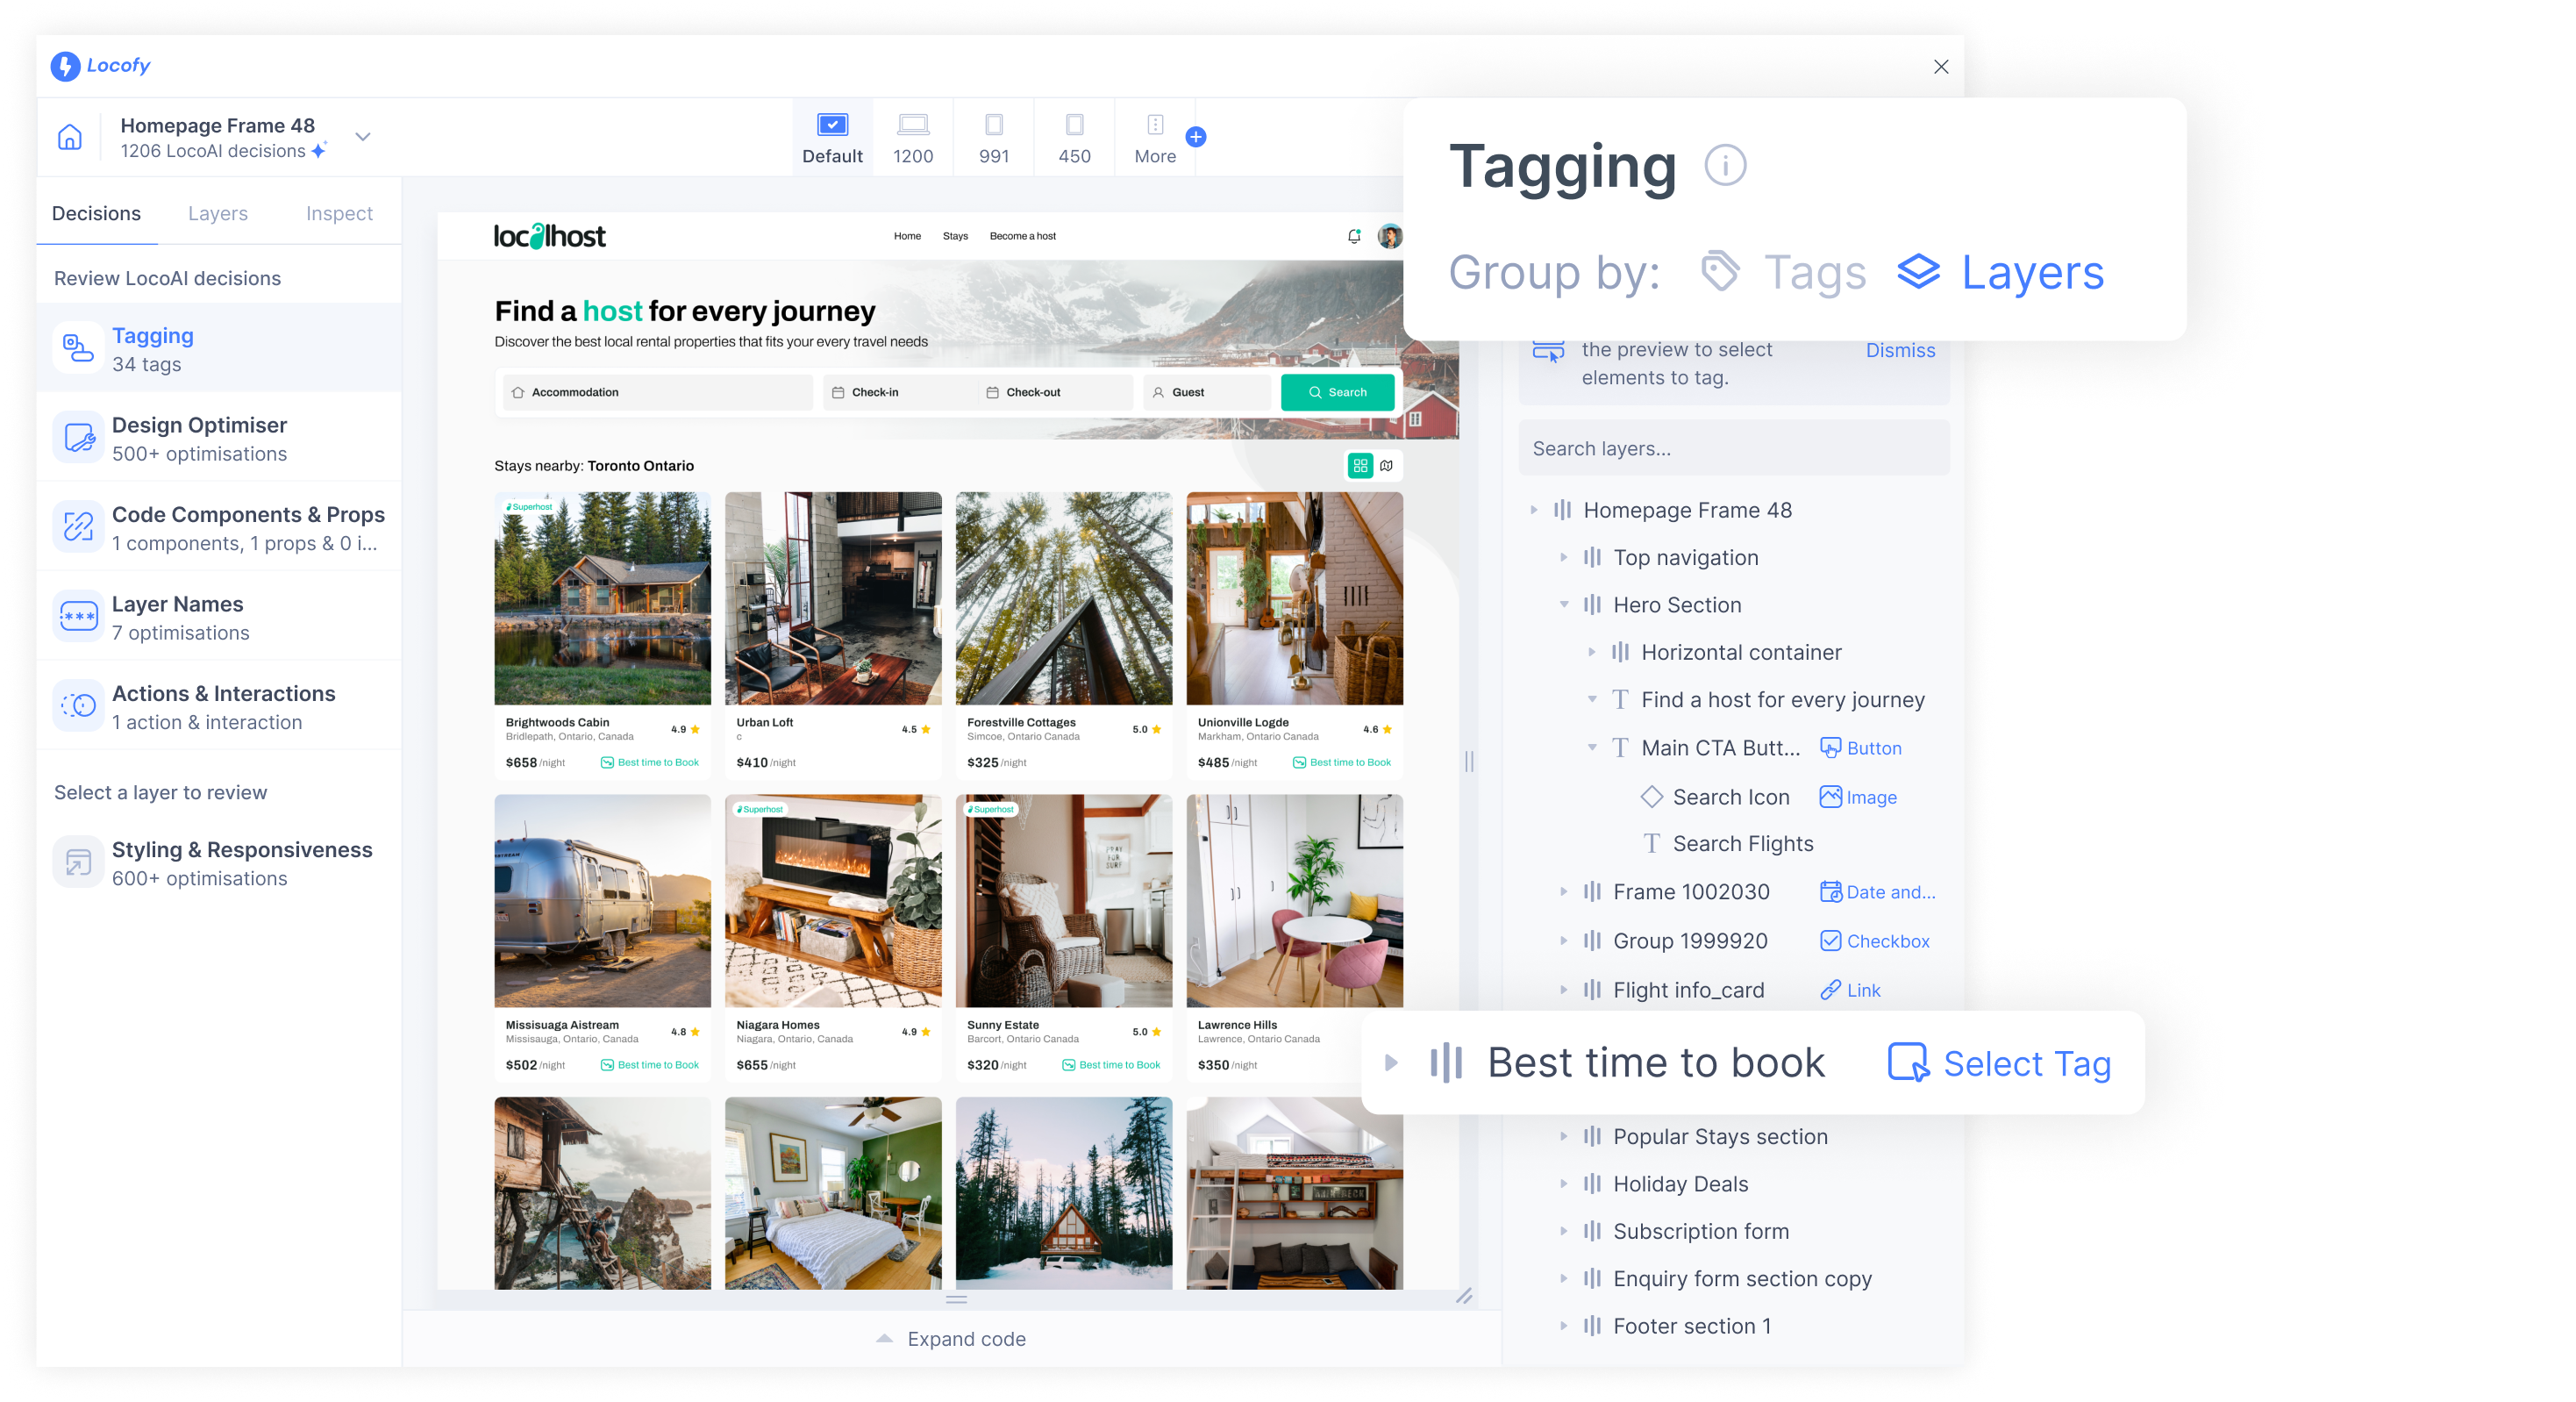
Go to Tagging in the Decisions, then on the right side of the panel Group by: Layers.
-
Use the tree view presented to you or the preview to select elements to tag.
-
Choose the appropriate tag from the dropdown.
Locofy supports various tags
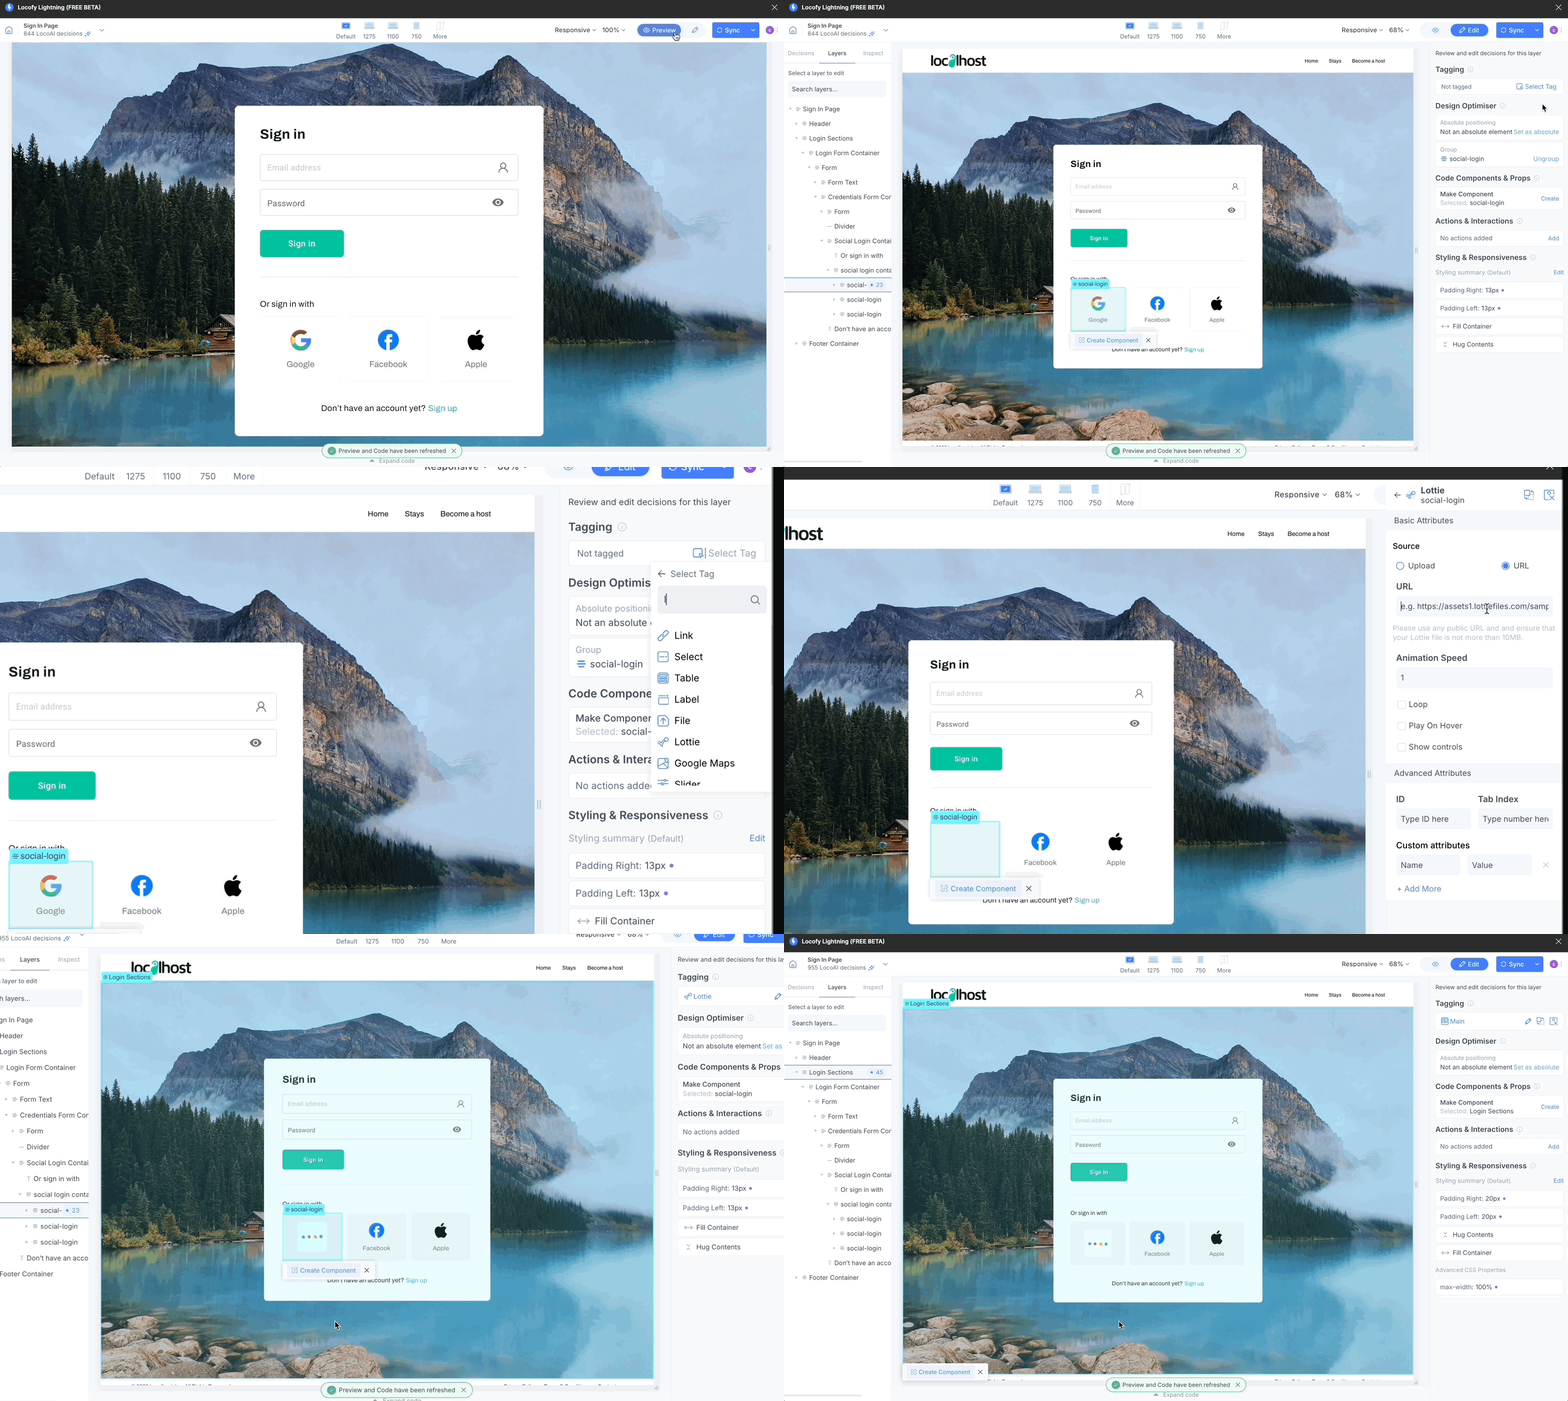
Tagging your Lottie files
- Select the frame you want the Lottie file to be in and tag it as "Lottie" by going to review Tagging section in the plugin.
- You will then be taken to the properties tab. You can upload or paste the URL for your Lottie file and customise other properties as well.
- You have successfully tagged a Lottie file.
